Learning how to install fireplace doors starts with confirming that the door set matches the fireplace. Do not start by reaching for a drill. A surface-mounted enclosure can suit a sound masonry fireplace, but factory-built units require doors listed for that exact model.
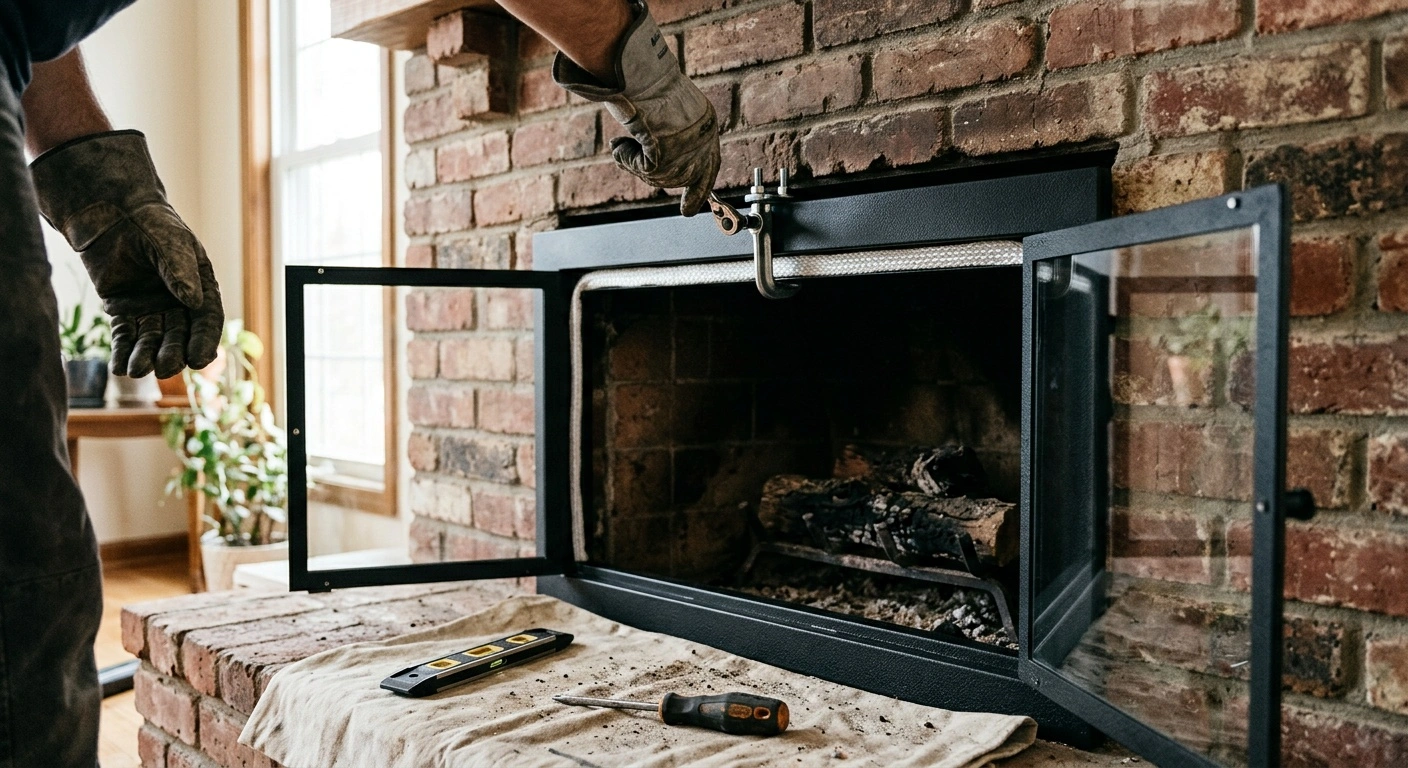
Most masonry fireplace doors attach to the steel lintel and brackets near the bottom of the opening. The hardware is simple, but the glass-and-metal assembly can crack if you twist, drop, or overtighten it. Ask a helper to hold the enclosure while you secure it.
Skill level: Beginner for a clamp-on masonry enclosure. Active time: About 1 to 2 hours. Total time: About 1 to 2 hours, plus any required sealant curing time.
Tools and Materials
- Fireplace door enclosure sized and approved for the fireplace
- Manufacturer-supplied lintel clamps, bottom brackets, screws, and anchors
- Manufacturer-supplied noncombustible fiberglass insulation or gasket material
- Tape measure
- Pencil or removable painter’s tape for reference marks
- Phillips and flat-head screwdrivers that fit the supplied hardware
- Adjustable wrench or socket set
- Drill/driver, if the installation instructions require drilled anchors
- Masonry bit that matches the supplied anchor diameter, if required
- Level
- Flashlight or work light
- Shop vacuum with a fine-dust filter
- Drop cloth, moving blanket, or flattened cardboard
- Work gloves and safety glasses
- Hearing protection for drilling
- Dust mask or respirator for drilling masonry or cleaning heavy ash
- High-temperature fireplace sealant, only if the door manufacturer specifies it
Before You Install Fireplace Doors
This guide covers a typical surface-mounted enclosure on a wood-burning masonry fireplace. Before deciding how to install fireplace doors, identify the fireplace type. You may have a site-built masonry fireplace or a factory-built metal unit, also called a prefabricated or zero-clearance fireplace.
Measure the opening width at the top and bottom. Then measure the height at the left, center, and right because older masonry openings may not sit square. Check the lintel depth, the mounting surface, and any raised hearth that could interfere with the lower frame.
Compare each measurement with the manufacturer’s sizing chart and required overlap. Do not assume a small, medium, or large enclosure will fit. Also confirm that the lintel, firebrick, mortar, hearth, and surrounding masonry can support the mounting system.
A clamp-on enclosure often does not require a permit, but local rules vary. Ask your building department whether the door, drilling, or other fireplace changes require approval. Always follow the fireplace and door manufacturers’ instructions if they differ from this general guide.
If the fireplace has gas logs, a gas starter, wiring, or a blower, check the appliance manual first. Do not cover vents or alter the opening without approval. Leave gas-line changes and venting work to a licensed professional because mistakes can cause fires, leaks, or carbon monoxide exposure.
Make sure the fireplace is completely cold. Remove loose ash, open the damper, and test nearby smoke and carbon monoxide alarms. Provide good lighting so you can see the lintel and mounting points clearly.
How to Install Fireplace Doors
-
Read the manual and inventory the hardware. Place a moving blanket or flattened cardboard on the floor. Set the enclosure on it as directed, then compare the clamps, brackets, screws, and insulation with the parts list.
Do not substitute longer screws or miscellaneous anchors. Incorrect hardware can damage the frame or fail under heat. Continue only after you identify every part and its mounting location.
-
Prepare the fireplace opening. Shovel out loose ash after the fireplace has cooled completely. Vacuum the mounting surfaces, lintel, and front edge of the firebox.
Remove soot and grit where the enclosure will rest. Do not soak porous brick or use flammable cleaners. The surfaces should be dry, stable, and free of debris before installation.
-
Install the supplied insulation or gasket. Fit the noncombustible insulation into the channels on the back of the enclosure. Distribute it around the top and sides as the manufacturer directs.
Never substitute wall insulation, spray foam, weatherstripping, or other unapproved materials. Keep the insulation inside its channel and away from cooling slots or air vents.
-
Attach the mounting hardware loosely. Install the lintel clamps and lower brackets in the indicated holes. Leave the fasteners loose enough to allow adjustment.
Hardware orientation varies between models. Position clamp hooks, pressure screws, and bracket flanges exactly as the manual shows. Each component should move into place without falling off the frame.
-
Set the enclosure against the opening. Ask a helper to lift the unit with you. Hold both sides and place the frame flat against the fireplace face.
Center the enclosure so the frame overlaps both sides and the top evenly. Check the frame with a level. No edge of the firebox opening should remain exposed.
-
Secure the upper lintel clamps. Reach through the open door area and position each clamp around the steel lintel. Follow the manufacturer’s diagram for the correct contact point.
Tighten the screws gradually and alternate between sides. This approach keeps the enclosure square. Stop when the clamps fully grip the lintel and gentle hand pressure cannot pull the frame forward.
-
Fasten or brace the lower brackets. Some enclosures use adjustable brackets against the firebox walls or floor. Others require manufacturer-specified masonry anchors.
If you must drill, wear eye protection, hearing protection, and a suitable dust mask or respirator. Use the specified masonry-bit size and follow the drill manufacturer’s instructions. Keep the vacuum nozzle near the hole to control dust when practical.
Do not drill firebrick, mortar, stone, tile, or the steel lintel unless the door manual identifies that location. Secure both brackets while keeping the frame level.
-
Square the enclosure and finish tightening. Check the level again and compare the visible overlap on both sides. Adjust the loose hardware before tightening each fastener.
Tighten only until the enclosure feels secure. Excessive force can bend the frame, strip an anchor, crack masonry, or stress the glass. The enclosure should remain straight and should not rock or shift.
-
Install or adjust the doors and screens. Reinstall any removed glass doors or mesh panels according to the manual. Place them in the correct tracks, hinge pins, or pivot sockets.
Open and close each panel several times. The glass and mesh should move freely, meet evenly, and latch as designed. Correct any scraping or binding before using the fireplace.
-
Complete the final safety check. Confirm that the hardware does not interfere with the damper, vents, gas controls, or mesh screens. Remove all tools and packaging from the firebox.
If the manufacturer requires high-temperature sealant, follow its stated curing time before lighting a fire. The frame should sit level and secure, and every moving part should operate freely.
Common Fireplace Door Installation Mistakes
The most common mistake is choosing doors by appearance instead of following the exact sizing chart. Measuring at only one point also creates problems. A masonry opening may widen near the bottom or measure taller on one side.
Never install generic masonry doors on a factory-built fireplace without specific approval. Both the fireplace manufacturer and door manufacturer must list the combination. An unapproved enclosure may block cooling airflow or expose nearby materials to excessive heat.
Do not leave out the supplied insulation because it appears optional. It fills irregular gaps and limits air movement around the frame. Household insulation and ordinary painter’s caulk may not withstand fireplace temperatures.
Avoid overtightening the clamps. Too much pressure can distort the frame and make the doors bind. It can also damage masonry, strip anchors, or place uneven stress on the glass.
Keep cooling vents, combustion-air openings, gas controls, and the damper path clear. Most standard tempered-glass doors must remain fully open while wood burns. Close the spark screen instead, unless the exact door manual permits another operating method.
When to Call a Professional
Stop the installation if you find a cracked lintel, loose firebrick, missing mortar, or a badly rusted damper. Heavy glazed creosote and smoke stains around the opening also require attention. Ask a qualified chimney professional to inspect these conditions.
Fireplace doors can improve appearance and help control room-air loss when the fireplace is not operating. However, they cannot repair a damaged firebox, flue liner, or chimney. Arrange an inspection if the fireplace has previously released smoke into the room.
Call a professional if you cannot identify a factory-built fireplace or locate its approved accessory list. A qualified installer can verify the correct door model and preserve the unit’s required airflow. Do not modify a factory-built firebox to make generic doors fit.
Leave gas-line changes, gas-log modifications, venting, and combustion-air problems to a licensed gas professional. These projects may also require permits. Improper work can cause a fire, gas leak, poor combustion, or carbon monoxide exposure.
Turn off the circuit breaker before touching fireplace wiring. Confirm that the circuit is dead with a non-contact voltage tester. Hire a licensed electrician when the project requires new wiring, a receptacle, or a dedicated circuit.
Older materials may require testing before you drill or cut them. Painted trim from before 1978 may contain lead. Old hearth adhesives, panels, and insulation may contain asbestos.
Ongoing Fireplace Door Maintenance
Inspect the enclosure periodically after the fireplace has cooled completely. Look for loose clamps, shifting brackets, rust, damaged insulation, and warped tracks. Check the glass for cracks, chips, or loose mounting hardware.
Tighten only the hardware identified in the door manual. Stop if a fastener spins, an anchor pulls loose, or the surrounding masonry crumbles. These conditions may require new approved hardware or professional repair.
Clean the panels with a product approved for fireplace doors and the specific glass type. Avoid abrasive pads, razor blades, and oven cleaner. Sudden temperature changes can also stress or crack the glass.
Vacuum ash from the tracks and lower frame so the doors and screens move freely. Replace damaged mesh, broken glass, or degraded gaskets with listed parts made for the enclosure. Do not install ordinary window glass.
Schedule chimney and firebox inspections based on fireplace use and condition. A door enclosure does not prevent creosote buildup. Keep smoke and carbon monoxide alarms working, and maintain the required clearance from rugs, baskets, firewood, and furniture.
Using New Fireplace Doors Safely
Before the first fire, test the damper and operate each door and screen. Make sure nothing shifted during installation. Wait until any required sealant or finish has completed its full curing period.
A new metal finish may produce an odor during initial heating. Follow the manufacturer’s ventilation instructions. Stop using the fireplace if the odor persists or you see smoke entering the room.
Unless the manual permits closed-door operation, keep the glass panels fully open while wood burns. Close the mesh screen to control sparks. Never assume that all fireplace glass can withstand direct heat from an active fire.
Watch the first fire for smoke leakage, glass movement, or a loosening frame. If anything binds, cracks, or shifts, extinguish the fire safely. Let the assembly cool completely and arrange an inspection before using it again.