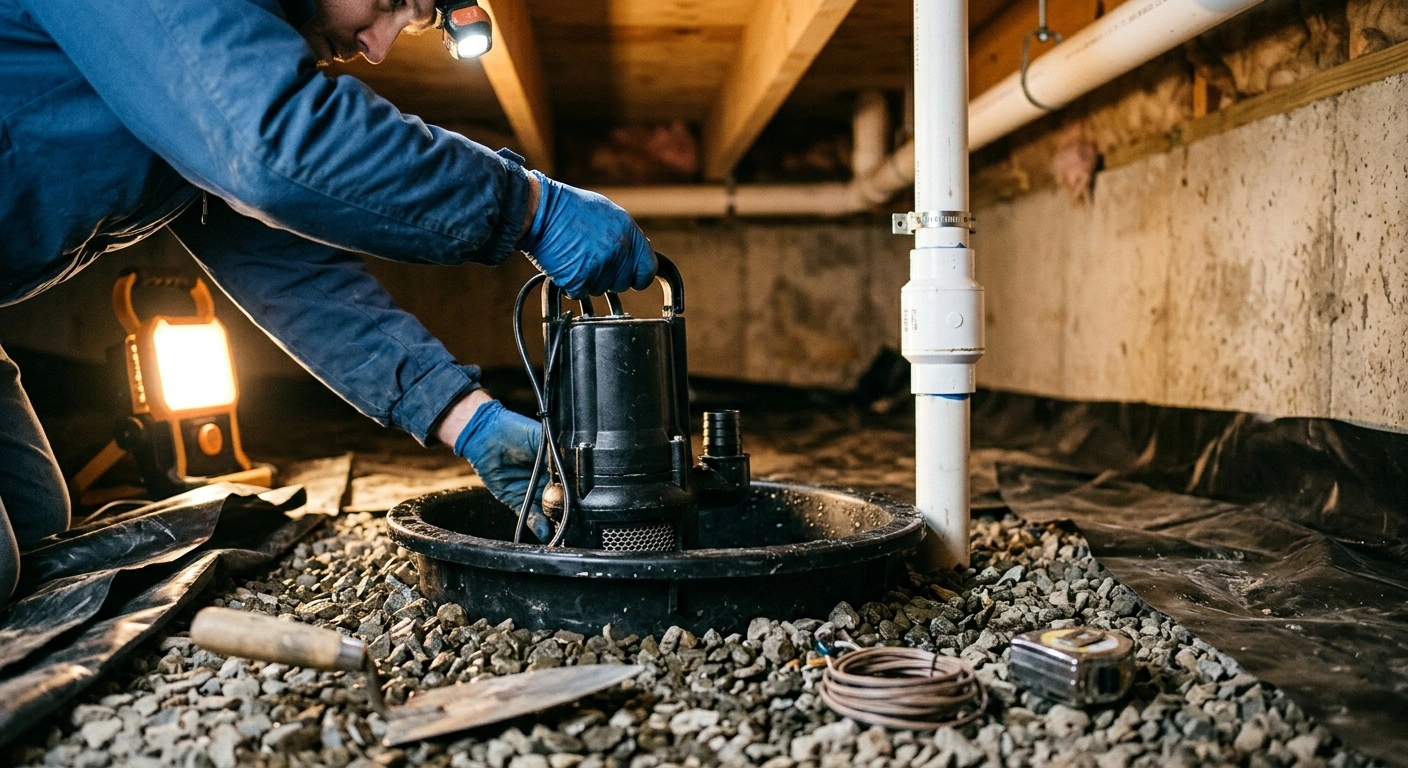
Learning how to install a sump pump in a crawl space starts with choosing the lowest practical collection point. You also need a stable basin and a discharge route that carries water away from the foundation.
An experienced DIYer can often complete this project. However, the work requires safe excavation, drainage-pipe assembly, confined-space access, and a suitable electrical receptacle.
Do not treat the pump as the entire drainage system. It cannot fix plumbing leaks, blocked exterior drains, poor grading, or discharge water that flows back toward the house.
Skill level: Intermediate
Active time: Typically 6 to 10 hours
Total time: Typically 1 to 2 days. Allow more time for concrete repairs, drainage corrections, or curing.
Tools and Materials
- Submersible sump pump sized for the required vertical lift and discharge run
- Sump basin with a fitted lid and enough room for the pump and float
- Basin inlet fittings or manufacturer-approved perforations
- Washed drainage gravel
- Filter fabric, if required by the basin or drainage-system manufacturer
- Discharge pipe in the diameter specified by the pump manufacturer, commonly rigid PVC
- PVC fittings, including long-sweep elbows where practical
- PVC primer and cement compatible with the pipe
- Threaded discharge adapter and approved thread sealant
- Full-flow sump pump check valve in the correct pipe size
- Union or removable check-valve coupling for pump service
- Pipe straps or hangers
- Exterior wall sleeve or approved penetration fitting
- Exterior-grade sealant compatible with the foundation and pipe
- Discharge extension, splash block, or approved drainage connection
- Replacement crawl-space vapor barrier and compatible sealing tape
- Shovel, trenching shovel, and hand trowel
- Digging bar or rotary hammer for hard soil or a concrete slab
- Reciprocating saw, hacksaw, or PVC cutter
- Drill with a suitable hole saw or masonry bit
- Tape measure, marker, and level
- Bucket or wet/dry vacuum
- Headlamp and portable work light rated for damp locations
- Non-contact voltage tester and plug-in receptacle tester
- Eye protection, work gloves, knee pads, and hearing protection
- Dust mask or suitable respirator for concrete, masonry, or dusty materials
- Accessible, grounded, GFCI-protected receptacle where local code requires one
Before You Start
Before deciding how to install a sump pump in a crawl space, identify the source of the water. Groundwater rising through soil or collecting near the footing may justify a sump system.
Water below a bathroom, kitchen, or supply line may indicate a plumbing leak. Repair that problem before installing a pump.
Check the gutters, downspouts, exterior drains, and soil grade. Roof runoff and ground that slopes toward the house can overwhelm a properly sized pump.
Inspect the Crawl Space for Hazards
Look for sewage, damaged wiring, heavy mold, pests, and deep standing water. Water can conceal sharp debris, electrical hazards, and unstable soil.
Do not enter if you find suspected sewage, exposed energized wiring, a strong fuel odor, or structural movement. Very tight crawl spaces can also contain air-quality hazards. Ask a qualified professional to assess and ventilate the area when conditions appear unsafe.
Measure the Basin and Discharge Route
Measure the crawl-space height, basin diameter, and required excavation depth. Leave enough overhead clearance to lift out the pump later.
Keep the basin clear of footings, piers, plumbing, ducts, and structural supports. Never excavate beneath a footing or remove soil that supports a pier.
Measure the vertical rise from the pump outlet to the discharge pipe’s highest point. Then estimate the total pipe length and count the fittings.
Use the manufacturer’s performance chart to check flow at the calculated total head. Do not select a pump based only on horsepower or maximum advertised flow.
Finally, check the float clearance. It must travel freely without touching the basin, lid, pipe, pump, or power cord.
Check Permits, Drainage Rules, and Utilities
Permit requirements vary by location and project scope. A pump replacement may not need a permit, but new wiring or drainage connections often do.
A foundation penetration, new circuit, or storm-system connection may also require inspection. Contact the local building department before starting the work.
Ask where local rules allow sump water to discharge. Many jurisdictions prohibit connections to sanitary sewers, septic systems, streets, or neighboring property.
A poor outlet can also cause erosion, ice, or water intrusion elsewhere. Call 811 several business days before any exterior excavation. Privately owned utility lines may require a separate locating service.
Confirm Electrical Compatibility
Use a permanent, grounded receptacle that meets the pump instructions and local electrical code. Do not use a permanent extension cord or an overloaded power strip.
Check whether the location requires GFCI protection. Also consider a pump alarm that reports power failures, high water, or a tripped protective device.
Before opening an electrical box, switch off the circuit at the breaker. Confirm the loss of power with a non-contact voltage tester and other appropriate test equipment.
New wiring and circuits commonly require a permit. Many jurisdictions also require a licensed electrician. If the crawl space lacks a suitable receptacle, install one before proceeding with the pump.
Plan for Vapor and Radon Control
Installing the basin usually requires cutting the ground vapor barrier. Plan to patch and seal that opening after setting the basin.
Use a fitted lid and compatible vapor-barrier tape or sealant. Keep the check valve, union, and other service connections accessible.
If the house has an active radon system, consult a qualified radon professional before altering the membrane or sealed sump lid. An open basin can release soil gases and reduce system performance.
How to Install a Sump Pump in a Crawl Space
-
Mark the basin location and pipe route. Place the basin at the lowest practical collection point and mark its outline. Keep it clear of footings, piers, utilities, ducts, and access paths.
Plan a discharge route that does not cross the float’s operating space. Confirm that you can remove the pump through the crawl-space opening.
-
Make the electrical area safe. Switch off the pump circuit and unplug the pump. Route the cord away from cutting, drilling, and excavation areas.
Before touching an electrical box, turn off the breaker and verify the loss of power. Do not continue if water has reached damaged wiring or electrical equipment.
-
Excavate the basin hole. Cut the vapor barrier neatly and fold it away from the work area. Dig the hole slightly wider than the basin.
Allow room for a compacted gravel base below the basin. Stop if you encounter a footing, support, utility, drain, or unidentified buried material.
-
Prepare the basin for water entry. Install the specified inlet fittings or drain-tile connection before lowering the basin. Add perforations only when the manufacturer or drainage plan calls for them.
Do not randomly drill a solid basin. Hole size and placement affect sediment entry, water collection, and pump cycling.
-
Set and level the basin. Add a compacted layer of washed drainage gravel to the bottom of the hole. Lower the basin and adjust the gravel until the top sits level.
Backfill evenly with the specified material. Avoid crushing or deforming the basin. It should remain stable when you press on the rim.
-
Attach the pump discharge adapter. Apply an approved thread sealant to the adapter. Thread it into the pump outlet without overtightening the housing.
Attach the first discharge-pipe section. Drill an anti-air-lock hole only if the pump manufacturer specifies its size and location.
-
Lower and position the pump. Place the pump flat on the basin bottom or an approved stand. Keep gravel and loose debris away from the intake.
Rotate the pump until the float has a clear path. Secure the cord so it cannot wrap around the float or enter the intake.
-
Install the check valve and service connection. Follow the arrow on the check valve. It must point away from the pump and toward the discharge outlet.
Place the valve on the vertical discharge section unless the manufacturer directs otherwise. Add a union or removable coupling so you can service the pump without cutting pipe.
-
Route and support the discharge pipe. Dry-fit the remaining pipe and use long-sweep fittings where practical. Avoid sags that hold unnecessary water or interfere with access.
Prime and cement PVC joints according to the product directions. Add enough hangers to support the pipe without loading the pump outlet.
-
Create and seal the wall penetration. Choose an approved location that avoids utilities, reinforcement, joists, beams, and foundation supports. Drill a hole sized for the sleeve or specified penetration fitting.
Support the pipe on both sides of the wall. Seal the gap with a compatible exterior-grade material to block water and pests.
-
Terminate the discharge safely. Extend the outlet to a location that carries water away from the house. The flow must not erode soil, cross a walkway, or flood neighboring property.
Protect the outlet from debris, animals, and freezing where necessary. Do not send the water back toward the footing.
-
Restore the vapor barrier and lid. Fit the basin lid around the discharge pipe and power cord. Patch the ground membrane with compatible material.
Seal overlaps and gaps around the basin. Preserve access to the union, check valve, lid fasteners, and pump cord.
-
Test the complete system. Clear tools from the basin and make sure the work area is dry. Restore power, then pour clean water into the basin until the float rises.
Run several complete cycles. Watch every joint, listen for unusual noise, and check the exterior outlet. The pump should start, lower the water level, and stop without leaking.
Common Crawl-Space Sump Pump Installation Mistakes
Never place the basin so close to a footing that excavation removes supporting soil. If you cannot maintain safe clearance, ask a foundation or drainage professional to choose the location.
Do not select a pump by horsepower alone. Check its output at the actual vertical lift, pipe length, and fitting resistance.
An undersized basin can cause rapid cycling. Frequent starts increase wear on the switch, motor, and check valve.
A backward check valve blocks the discharge. A missing or leaking valve allows water to drain back after every cycle.
Support the discharge pipe independently. Unsupported piping can crack fittings or place damaging leverage on the pump outlet.
Check float movement before closing the lid. A trapped float can keep the pump running or prevent it from starting.
Do not terminate the discharge beside the foundation. That approach sends collected water back into the soil around the house.
Finally, seal the vapor barrier around the basin. An open membrane increases crawl-space humidity and may interfere with radon control.
Troubleshooting After Installation
The Pump Runs, but Water Stays in the Basin
Problem: The motor runs, but the water level remains high. Possible causes: A backward check valve, blocked pipe, frozen outlet, or air-locked pump.
Switch off and unplug the pump before inspecting the valve and accessible piping. Confirm that the valve arrow points toward the exterior outlet.
Clear only obstructions that you can reach safely. Follow the manufacturer’s instructions for any anti-air-lock hole. Do not run the pump dry or against a blocked outlet.
Test the system again with clean water. The repair worked if water exits outside and the basin level drops normally.
The Pump Starts and Stops Too Often
Problem: The pump cycles every few minutes or restarts immediately. Possible causes: A small basin, restricted float, leaking check valve, or excessive water inflow.
Inspect the float and listen for water rushing back after shutdown. A large return flow often indicates a leaking or missing check valve.
Clean or replace a serviceable valve with the correct size and type. Follow its flow arrow during installation.
Persistent rapid cycling may indicate a poor match between the pump, basin, and water inflow. Ask a drainage professional to evaluate the system if adjustments do not help.
The Pump Does Not Start
Problem: Water rises above the normal start point without activating the pump. Possible causes: A trapped float, power loss, tripped GFCI, or failed pump.
Keep your hands out of the water while checking the breaker and GFCI from a dry location. Never handle a submerged pump while it remains plugged in.
Before opening a receptacle box, switch off the breaker and verify the loss of power. Do not repeatedly reset a breaker or GFCI that continues to trip.
Repeated trips can signal a pump fault or electrical problem. Call an electrician or pump professional if you cannot identify a safe, obvious cause.
Water Returns After the Pump Stops
Problem: The basin refills quickly after each cycle. Possible causes: A failed check valve or an outlet that sends water back toward the foundation.
Inspect the valve for debris, damage, and correct orientation. Then watch the exterior discharge during a test cycle.
Extend or redirect the outlet if water pools near the house. Follow local rules and prevent runoff from entering neighboring property.
The Discharge Pipe Freezes
Problem: The pump runs, but little or no water exits during freezing weather. Possible causes: Trapped water, poor pipe slope, or a blocked exterior outlet.
Turn off the pump before inspecting accessible pipe. Never use an open flame to thaw PVC or nearby building materials.
Correct low spots and protect the termination from ice buildup. A drainage professional can recommend a freeze-resistant outlet for severe climates.
When to Call a Professional
Call a foundation or drainage professional if the basin requires excavation beside or below a footing. The same applies near piers and structural supports.
Structural cracks, bowing walls, moving piers, and repeated soil washout need evaluation before excavation. Extensive trenching or perimeter drains also require specialized planning.
Hire a licensed electrician if the crawl space lacks a suitable receptacle. You should also call one for new circuits, damaged wiring, or repeated breaker and GFCI trips.
Shut off the breaker before any electrical inspection or repair. Local rules may require a permit and licensed electrical work.
Ask a plumber to investigate water from supply, drain, or sewer lines. A sump pump should not conceal an active plumbing leak.
Use trained remediation contractors for sewage, strong odors, extensive mold, animal contamination, or inaccessible standing water. Consult a radon professional before changing a sealed membrane or sump cover.
Contact the local building department if you have questions about permits, inspections, or discharge locations. Confirm the rules before cutting a foundation opening or connecting to a drainage system.
Ongoing Sump Pump Maintenance
Test the pump several times each year. Test it again before the season when groundwater normally reaches its highest level.
Pour clean water into the basin until the float starts the pump. Confirm that the pump lowers the water level and shuts off normally.
Watch the check valve and pipe joints during the test. Look for drips, movement, unusual vibration, and excessive backflow.
Unplug the pump before reaching into the basin. Remove sediment from the float, intake, and basin without damaging the pump.
Inspect the exterior outlet for leaves, nests, soil buildup, erosion, and ice damage. Confirm that the outlet still carries water away from the foundation.
Check the pipe supports, lid, and vapor-barrier seals during each service visit. Repair loose hangers and membrane gaps promptly.
If outages occur often, consider a properly sized battery backup pump and high-water alarm. Use equipment designed for sump service rather than extension cords or indoor portable power sources.
What a Reliable Installation Looks Like
A reliable crawl-space sump system starts with a stable basin that sits clear of structural supports. The float moves freely, and supported piping places no stress on the pump.
The discharge reaches an approved location and carries water away from the house. It does not create erosion, ice, or standing water near the foundation.
The pump uses a permanent, grounded power supply suitable for the damp location. The installation includes no improvised extension cords or overloaded power strips.
The fitted lid and repaired vapor barrier limit ground moisture and soil gases. At the same time, the check valve and union remain accessible for service.
Repeated water tests provide the final check. The pump should start, empty the basin, stop normally, and leave every connection dry.