A mobile home kitchen remodel should make a small footprint easier to use. It should not force a full-size house layout into a narrow room. Common problems include limited counter space, shallow storage, tight walkways, and finishes that make the kitchen feel cramped.
The ideas below progress from weekend updates to projects that require trade help or a contractor. Manufactured homes may have light wall framing, low ceilings, nonstandard fixtures, and floors sensitive to added weight. Plan around these limits to create a brighter, more practical kitchen without overbuilding it.
Plan the Mobile Home Kitchen Remodel Around the Existing Shell
Measure the room before ordering cabinets or appliances. Record wall dimensions, ceiling height, openings, appliance widths, countertop depth, and plumbing locations. Also measure the narrowest aisle with appliance doors open.
Take measurements at the floor, counter, and ceiling. Walls in older manufactured homes may not be square or plumb. Note any changes in width or height on your floor plan.
Next, identify walls that contain plumbing, wiring, ducts, or structural supports. Ask a qualified contractor or engineer to review a wall before anyone alters it. Interior walls may support cabinets or conceal important utility lines.
Keeping the sink, range, and dishwasher in place usually controls costs. Relocating these fixtures often requires new plumbing, wiring, ventilation, and finish repairs.
Check the home’s data plate or manufacturer information when available. Do this before adding stone counters, large tile installations, or oversized appliances. Confirm that the floor and cabinet boxes can support the proposed materials without excessive movement.
Community rules may restrict exterior vents, window changes, work hours, and debris handling. Contact the local building department about permits and inspections before work begins.
DIY Weekend Ideas With Minimal Layout Changes
These projects leave the cabinets, walls, plumbing, and major appliances in place. They suit limited budgets and kitchens that function well but look dated. They also avoid the extended downtime caused by demolition.
Complete one update at a time and check the clearances after each step. Thick cabinet doors, deep handles, and projecting shelves can narrow an already tight aisle. In a small kitchen, clear walking space matters more than a dramatic feature.
Paint Sound Cabinet Boxes and Replace the Hardware
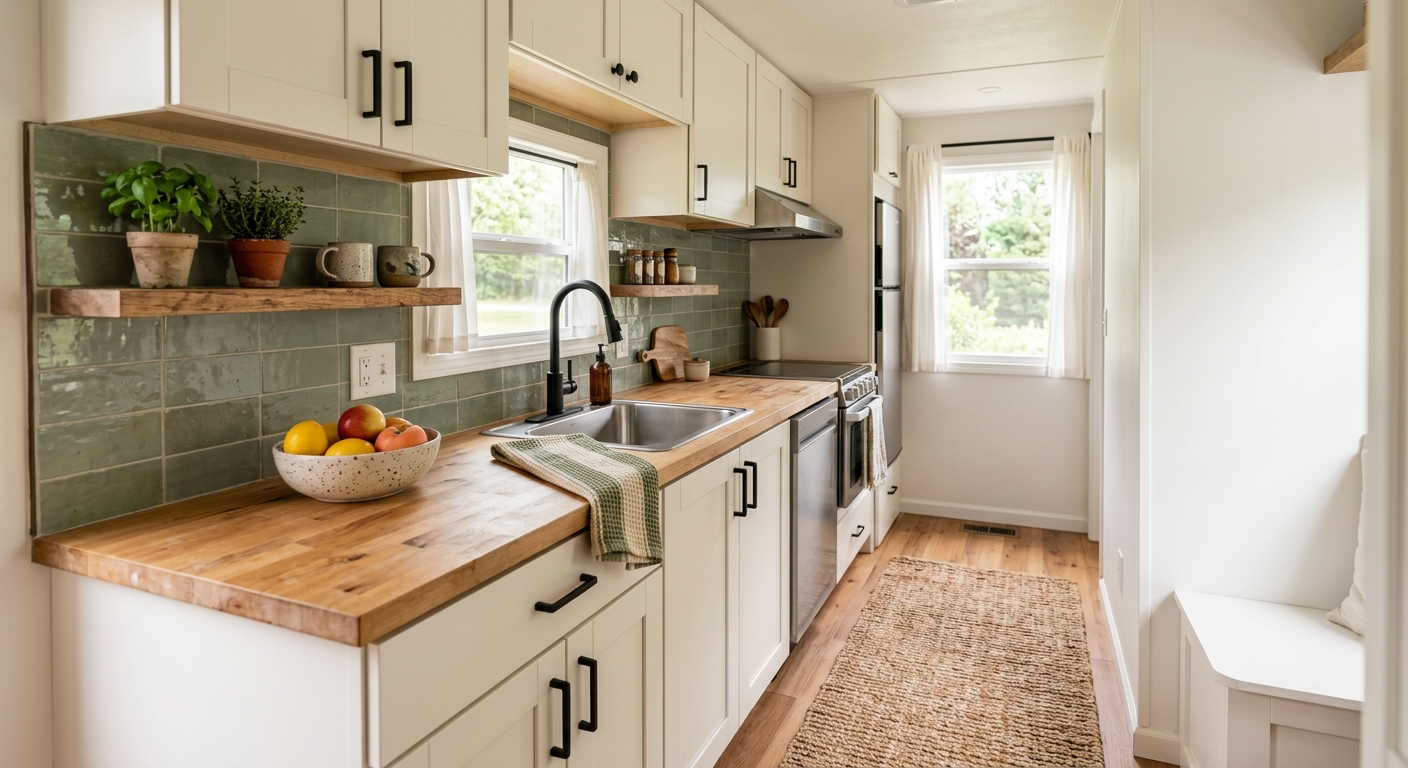
Paint can update solid cabinet boxes without the cost and waste of full replacement. Light cream, muted green, soft gray, and warm white reduce the visual weight of upper cabinets. Simple pulls also make doors easier to operate.
Effort level: DIY weekend. Cleaning, sanding, priming, painting, and curing may extend the project across several days.
Identify the cabinet material before choosing a primer. Laminate, vinyl-wrapped panels, wood, and factory-finished fiberboard require different products. Repair swelling, delamination, soft bottoms, and water damage before painting.
Remove the doors and label each location. Degrease every surface, follow the coating maker’s sanding guidance, and apply a compatible bonding primer. Give the finish enough curing time before regular use.
Choose pulls that reuse the existing screw holes when possible. New holes can chip thin or brittle doors. Support the back with scrap wood and use a hardware template while drilling.
Turn Empty Wall Areas Into Shallow Storage
Shallow shelves, magnetic knife strips, rail systems, and spice ledges use vertical space without crowding the aisle. Consider space beside the refrigerator, above a short backsplash, or on a base cabinet end panel.
Effort level: DIY weekend. Mount storage only to verified framing or solid cabinet panels.
Standard wall-anchor guidance may not apply to your home. Manufactured-home panels and framing can be thinner, and stud spacing may vary. Use a stud finder carefully, then verify locations through a concealed test hole.
Store heavy cookware and dish stacks in base cabinets. Keep open shelves away from the range unless you are willing to clean grease from exposed items. Check head clearance, door swings, and traffic paths before installation.
Add Roll-Out Storage Inside Base Cabinets
Roll-out trays make deep base cabinets easier to use. They work well for pots, food containers, and cleaning supplies under the sink.
Effort level: DIY weekend. Choose a surface-mounted organizer that fits through the clear cabinet opening.
Measure between the hinges instead of measuring only the cabinet box. Account for plumbing traps, valves, center stiles, and face-frame lips. A narrow pullout that opens fully works better than a wide one that hits a hinge.
Fasten the slides into sound material with the recommended screw length. Reinforce a weak cabinet bottom or choose a lightweight wire organizer. Under-sink units must leave valves accessible and avoid rubbing against pipes.
Use a Thin Backsplash to Brighten the Work Area
A backsplash can add color and make splashes easier to clean. Options include thin ceramic tile, kitchen-rated sheet material, and suitable peel-and-stick products.
Effort level: DIY weekend. A simple backsplash requires a flat, stable, and clean surface.
Inspect the wall for loose panels, grease, soft spots, and moisture damage. Flexible panels may not support tile, and substrate movement can break the bond. Repair the wall before covering it.
Follow the adhesive or mortar manufacturer’s directions. Do not apply tile over an unidentified coating without checking compatibility. Near a range, use materials approved for the location and maintain the appliance maker’s clearances.
Turn off the circuit before removing outlet covers. Confirm that it is dead with a non-contact voltage tester. Call an electrician if the boxes require relocation or extension, especially when local rules require a permit.
Kitchen Updates That Work Best With Trade Help
These projects retain the general footprint but replace parts connected to plumbing, wiring, or fixed cabinetry. They can improve function without the cost of moving the entire kitchen.
Order materials only after the installer verifies dimensions and utility requirements. Ask each trade what work must happen before the cabinets or counters arrive. Good scheduling prevents workers from cutting into new finishes later.
Replace Bulky Cabinets With Space-Smart Sizes
New cabinets can improve storage without expanding the footprint. Drawer bases, tray dividers, narrow pullouts, and full-extension drawers use space more efficiently than fixed shelves.
Effort level: DIY with trade help. Hire qualified help when installation affects utilities, walls, or uneven floors.
Stock cabinets may not fit under a low ceiling or existing soffit. Measure appliance openings, window trim, ducts, ceiling transitions, and countertop height. Leave room for filler strips when walls are out of square.
Two people should lift upper cabinets. Installers must secure them to verified framing or structural backing, not thin wall paneling. Store the heaviest items in lower cabinets.
Do not block natural light or return-air pathways with tall storage. Confirm the wall and floor capacity before selecting dense cabinets or loading an entire wall.
Choose Counters That Suit the Existing Structure
Laminate and wood counters often suit manufactured homes because they weigh less than stone. Installers can also fit them to irregular walls. Solid-surface materials may work when the cabinets and floor provide sound support.
Effort level: DIY with trade help. Long counters are difficult to carry, and sink cutouts create weak sections during handling.
Check the cabinet tops for level. Look for loose joints, sagging floors, and water damage around the sink base. Reinforce or replace weak boxes before installing a rigid counter.
Stone and thick tile add substantial weight and stiffness. These materials may require cabinet reinforcement and a floor assessment. Ask a qualified professional to confirm the support before ordering them.
Install a Better-Sized Sink and Faucet
A single-bowl sink can offer more washing room than a divided model of the same width. A compact pull-down faucet also makes large pans easier to rinse.
Effort level: DIY with trade help. Corroded valves and unusual fittings can turn a basic replacement into a plumbing repair.
Shut off the water and open the faucet to relieve pressure. Confirm that the sink fits the cabinet and counter cutout. Leave space for clips, supply lines, the faucet body, and the drain assembly.
Stop if a shutoff valve does not close fully. Have a plumber replace it before removing the old fixture.
Keep the drain route simple and all slip joints accessible. Identify the existing pipe material and use approved transition fittings. Call a plumber for brittle pipes, hidden leaks, damaged drains, or unidentified connections.
Add Task Lighting Without Crowding the Ceiling
Under-cabinet lights illuminate work surfaces better than a single ceiling fixture. Low-profile products also suit kitchens with limited headroom.
Effort level: DIY with trade help. Homeowners can install suitable plug-in products, but an electrician should handle new hardwired connections.
Choose fixtures rated for the intended location. Position them near the front of the upper cabinets to spread light across the counter. Place switches where users can reach them without leaning over the sink or range.
Do not pinch cords behind cabinets or run them through wet areas. Never use an extension cord as permanent wiring.
Before touching wiring, turn off the breaker and verify the circuit with a non-contact voltage tester. Stop if you find overheated conductors, improvised splices, ungrounded boxes, or unfamiliar aluminum wiring. Ask the building department whether the work requires a permit or licensed electrician.
Replace Appliances With Models That Fit the Room
Compact and counter-depth appliances can restore aisle space in a narrow kitchen. Choose models according to the available opening, door swing, ventilation, and utility connections.
Effort level: DIY with trade help. Use professional installation for gas, venting, plumbing, or electrical connections when required.
Measure the appliance body and all required clearances. Include hinges, handles, airflow gaps, cords, hoses, and room for door removal. Check whether refrigerator doors open far enough to remove interior drawers.
Lower the oven door during planning to test the remaining aisle. For dishwashers, follow local rules for a high loop or air gap. Shut off the water and relieve pressure before disconnecting the supply.
Leave fuel conversions and gas connections to licensed professionals. Poor connections or venting can cause fires, explosions, and carbon monoxide exposure. A new electrical circuit may also require a permit and licensed electrician.
Contractor-Level Changes for a Better Small-Space Layout
Consider major changes when the current layout blocks movement or wastes a full wall. Contractor work may also make sense when water has damaged the cabinets or floor.
Demolition often exposes hidden utilities and structural problems. Include money and time for repairs that workers cannot see before opening the room.
Ask the contractor to document appliance clearances, ventilation, utility routes, cabinet support, and floor condition. Confirm permit requirements with the local building department. Managed communities may also require approval for exterior penetrations or construction activity.
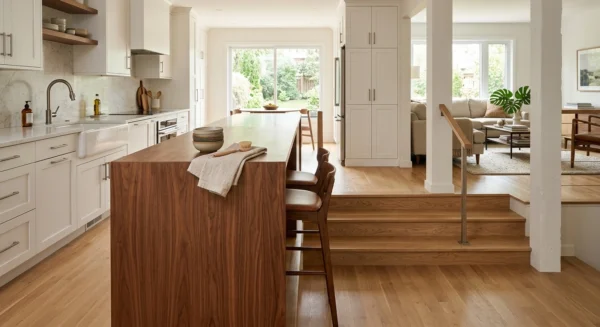
Replace a Crowded Island With a Narrow Peninsula
A peninsula can add preparation space and storage while connecting to a wall or cabinet run. In some narrow kitchens, it leaves a clearer route than a freestanding island.
Effort level: contractor job. Professional work may be necessary for floor anchoring, outlets, plumbing, or flooring changes.
Mark the full footprint with painter’s tape and cardboard boxes. Then open every nearby appliance and door. Check where people will stand while cooking, cleaning, and unloading groceries.
Add seating only if the remaining aisle stays practical. The peninsula must not block the home’s only walkway, floor registers, access panels, or utility connections.
Installers should locate hidden pipes and wires before anchoring cabinets. Choose a movable worktable instead if the floor cannot accept fasteners or the peninsula restricts traffic.
Rework One Cabinet Run Instead of Moving the Whole Kitchen
Fixing one weak section may improve the room more than relocating every appliance. A contractor might replace a blind corner with drawers or move the refrigerator away from a doorway. Shortening a cabinet run can also create a useful landing area.
Effort level: contractor job. A limited layout change may still affect counters, floors, utilities, and wall finishes.
Keep the sink and range in place when possible. This choice limits plumbing, electrical, and ventilation work. Ask for a scaled plan that shows every appliance door open.
Include landing space beside major appliances rather than filling every inch with tall storage. Confirm that workers can anchor the new cabinets to existing framing. Repair rot or leak damage before closing the walls and floor.
Order countertops after installers secure and level the final cabinets. A template taken too early can produce poor seams or wall gaps.
Open a Pass-Through Only After a Structural Review
A pass-through can share light between the kitchen and living area without removing the whole wall. It may also provide a shallow serving counter.
Effort level: contractor job. Complete the structural review before cutting the wall.
A contractor or engineer must determine whether the wall carries a structural load. Manufactured-home walls may support roof sections, marriage-line connections, or cabinets. They may also conceal wiring, plumbing, and ducts.
Qualified trades should relocate utilities under the required permits. Ask for a complete estimate that includes reinforcement, finish repairs, and utility work. Keep the wall intact if the cost outweighs the practical benefit.
Homes built before 1978 may contain lead-based paint. Older wall, floor, ceiling, and duct materials may also contain asbestos. Test suspect materials before sanding, cutting, or demolition, and follow applicable safety requirements.
Repair the Subfloor Before Installing New Flooring
Soft flooring near a sink, refrigerator, dishwasher, or exterior door often indicates repeated moisture exposure. New flooring will not repair the damage and may hide a growing problem.
Effort level: contractor job. Hire a contractor when repairs require cabinet, wall, plumbing, or large subfloor removal.
Find and stop the moisture source first. Remove damaged material back to sound structure, then support every edge of the replacement panel. A contractor familiar with manufactured homes should protect nearby ducts, pipes, insulation, and belly material.
Select flooring that tolerates routine kitchen moisture without adding excessive weight or height. Thick flooring can interfere with doors, registers, appliance removal, and dishwasher clearance. Do not install rigid tile while the floor still flexes.
Make Your Mobile Home Kitchen Remodel Work for Daily Use
The strongest results usually come from measured improvements rather than one oversized design move. Start with the problem that affects daily work, such as poor lighting or limited preparation space. Then choose the simplest update that solves it without creating a new clearance or weight problem.
Keep plumbing and major appliances in place when the layout already functions well. Direct the budget toward accessible drawers, task lighting, durable counters, and repairs to weak cabinets or floors.
Use fixtures and fasteners compatible with manufactured-home construction. Verify framing before hanging weight, and check structural capacity before adding heavy finishes. Hire qualified professionals for wall removal, gas work, major plumbing, new wiring, or structural floor repairs.
Finally, mark the proposed layout at full size before ordering anything. Cabinet drawings can look generous even when open doors and drawers leave no room to move.
A well-planned mobile home kitchen remodel protects clear walkways, safe utility connections, and reachable storage. Those practical choices make a compact kitchen easier to cook in every day.