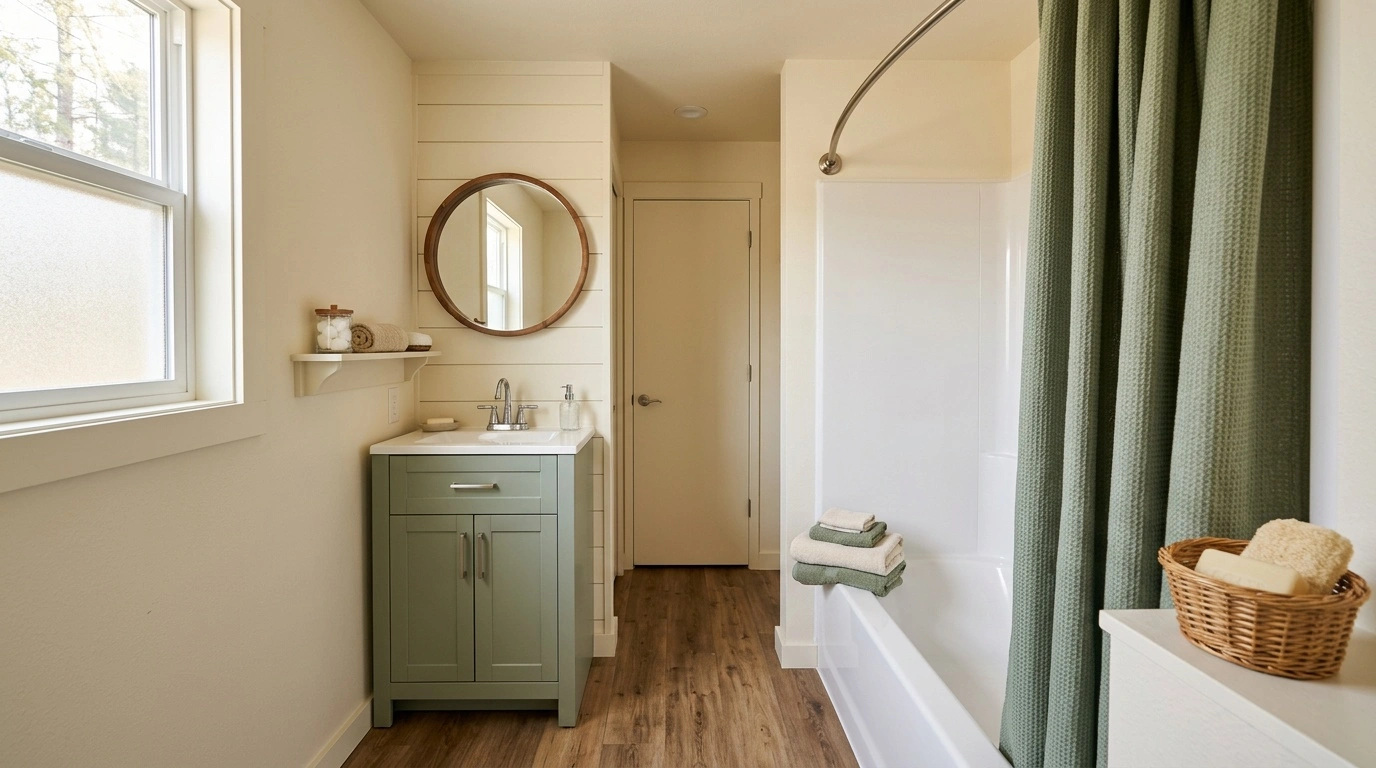
A mobile home bathroom remodel works best when you fix practical problems before buying decorative finishes. Limited space, lightweight walls, specialized plumbing, and nonstandard fixtures can complicate an otherwise simple renovation. Measure carefully before removing anything.
To control costs, keep the existing layout and reuse sound fixtures. Spend first on water damage, ventilation, storage, and hard-to-clean surfaces. You can handle many cosmetic updates over a weekend, but structural, plumbing, and electrical work often requires qualified trade help.
Before ordering materials, confirm that every fixture fits the room and can pass through all exterior and interior doors. A tub that fits the bathroom dimensions will not help if you cannot get it inside the home.
Before You Start a Mobile Home Bathroom Remodel
Measure the room, doorway, toilet footprint, vanity, ceiling height, and tub or shower opening. Record the locations of supply lines, drains, vents, receptacles, and floor registers. Do not assume a replacement marked “standard” will fit.
Some manufactured homes use narrow tubs, shallow vanities, compact toilets, or uncommon plumbing locations. Check product specifications against your measurements before ordering. Also confirm that doors, drawers, and fixtures will have enough operating clearance.
Inspect the floor around the toilet, tub, shower, and vanity. Look for softness, swelling, stains, loose flooring, or musty odors. These signs may point to an active leak or earlier water damage.
Check the wall construction before mounting cabinets, grab bars, or heavy mirrors. Manufactured-home walls may use thin framing or uncommon stud spacing. Locate solid framing and choose fasteners rated for the wall material and expected load.
Do not alter a wall until a qualified contractor or engineer confirms its purpose. A thin wall may still carry loads, brace the home, or contain utilities. Ask the local building department about permits for structural work, wiring, plumbing, and ventilation changes.
Homes built before 1978 may contain lead-based paint. Older floors, wall panels, adhesives, and insulation may also contain asbestos. Arrange appropriate testing before sanding, scraping, cutting, or demolition.
If the home sits in a managed community, review its rules before work begins. Management may regulate contractor access, waste disposal, plumbing shutdowns, and exterior vent penetrations. These requirements can apply even when the local government does not require a permit.
Low-Cost Ways to Improve Existing Features
Repaint sound walls and trim. Fresh paint can brighten dark or dated surfaces without demolition. Choose a washable coating intended for humid rooms, and repair loose seams before painting.
Paint will not stop condensation, mold, or a hidden leak. Find and correct the moisture source first. Allow repaired surfaces to dry before applying primer or paint.
Refresh the vanity instead of replacing it. Clean, scuff, prime, and paint a structurally sound cabinet. This approach works particularly well when the existing vanity has an uncommon size.
Do not paint swollen particleboard or a crumbling cabinet base. Water-damaged material rarely holds a durable finish. Replace the damaged section or the entire cabinet after fixing the leak.
Replace worn hardware and accessories. New cabinet pulls, hooks, towel bars, and a shower curtain can give the room a more consistent look. A replacement faucet may also improve function without changing the vanity.
Shut off the water and relieve pressure before opening a plumbing line. Mount accessories into framing whenever possible. If framing is unavailable, use anchors approved for the actual wall material and load.
Budget Storage Ideas for a Small Bathroom
Add shallow wall storage. A slim medicine cabinet or narrow shelf uses vertical space without crowding the walkway. A small cabinet above the toilet can also work if it clears the tank and user space.
Locate studs before drilling, and check the cabinet’s loaded weight. Thin wall panels may not support a deep cabinet filled with bottles and towels. Use a surface-mounted medicine cabinet if cutting into the wall could disturb utilities.
Use the back of the door carefully. Lightweight hooks or a shallow organizer can hold towels and small toiletries. This keeps the floor clear in bathrooms where a cart would block the vanity or toilet.
Keep the load light and use fasteners that cannot penetrate the opposite face. Make sure the organizer clears the wall, latch, and nearby fixtures when the door opens.
Choose removable storage. Baskets, a narrow rolling cart, or an open shelf can add organization without permanent construction. These options suit renters and owners who plan to replace the vanity later.
Keep shutoff valves, sink traps, receptacles, and floor registers accessible. Do not pack supplies around plumbing joints because hidden leaks can damage the cabinet before anyone notices them.
Mid-Budget Mobile Home Bathroom Remodel Ideas
Install a properly sized vanity. A compact replacement can improve storage and remove a cabinet damaged by years of small leaks. Choose a model that matches the existing supply and drain locations as closely as possible.
A plumber may need to adjust unusual connections. Never force rigid drain parts into alignment because stressed joints often leak. Test every connection before storing items inside the cabinet.
Replace the mirror with a medicine cabinet. A surface-mounted cabinet adds storage without opening the wall. It also reduces the risk of cutting into framing, wiring, plumbing, or an exterior wall cavity.
Confirm that the wall can support the cabinet and its contents. Ask someone to help lift a large mirrored unit. Recessed installation usually requires more investigation and wall repair.
Upgrade existing lighting. A new fixture can improve visibility if compatible wiring and an approved electrical box already exist. Local rules must also allow homeowners to perform the work.
Turn off the circuit at the breaker before touching any wiring. Use an appropriate tester to verify that the circuit is de-energized. New wiring or circuits typically require a permit and a licensed electrician in many jurisdictions.
Affordable Bathroom Flooring
Install a water-resistant floating floor over a sound base. Click-lock resilient flooring can cover a worn but flat surface with limited demolition. Its quick installation makes it practical for a small room.
Do not use a floating floor to hide a soft, swollen, or delaminated subfloor. The movement will damage the new flooring and may allow deterioration to spread. Repair the underlying problem first.
Consider sheet vinyl for fewer seams. One piece may cover an entire compact bathroom. Fewer joints give splashed water fewer paths to the underlayment.
Accurate templating and cutting can be difficult around corners and toilet flanges. Follow the manufacturer’s instructions for adhesive, underlayment, and edge treatment. Caulk cannot correct a poor fit or unstable base.
Repair damaged subflooring before adding finishes. Remove the toilet and enough flooring to identify the full repair area. Surface damage may extend into the subfloor, joists, perimeter framing, or supports.
A capable homeowner may replace a small subfloor section with trade guidance. Call a contractor for soft, cracked, sagging, or extensively discolored framing. Never cover rotten material with a second layer.
Wall and Backsplash Updates Without Major Demolition
Add a small vanity backsplash. A few tile rows or a single water-resistant panel can protect the sink wall. This limited area also allows you to add color without covering the entire room.
Start with a flat, dry, and stable surface. Choose adhesives and grout that suit the substrate and exposure. A decorative backsplash cannot repair loose panels or stop a hidden leak.
Install paneling outside direct wet areas. Beadboard-style panels or simple trim can cover minor cosmetic damage. Choose products intended for humid interiors, and keep them away from direct shower spray unless the manufacturer approves that use.
Follow instructions for expansion gaps and cut-edge sealing. Avoid trapping moisture against an exterior wall. Investigate dampness before covering any stained or swollen surface.
Repair seams with movement in mind. Manufactured-home wall panels often have battens or joints that shift slightly. Flexible, compatible finishes usually perform better than thick patches that crack as the home moves.
You can repair minor cosmetic seams over a weekend. Recurring cracks, widespread movement, or doors that suddenly sit out of square need further investigation. These signs may indicate support or structural problems.
Shower and Tub Improvements by Effort Level
Begin with fresh caulk and trim. Remove failed caulk around the tub, shower, and wall panels. Clean the joint, let it dry, and apply a compatible bathroom sealant.
Do not caulk over mold, standing moisture, or loose fixtures. New sealant will not fix movement or a leak behind the surround. Correct those conditions before closing the joint.
Replace the curtain and rod before installing glass. A curved or better-positioned rod can create more elbow room without moving the shower base. A washable curtain costs less and remains easy to replace.
Secure the rod to suitable framing or rated anchors. Glass doors add weight and require a stable curb and walls. Professional installation may make sense for heavy or complicated systems.
Choose replacement tubs and surrounds by measured dimensions. Manufactured-home tubs may be shorter, narrower, or lighter than common residential models. Drain locations can also differ.
Confirm that the replacement suits the intended installation and can pass through every doorway. Demolition may reveal plumbing damage, weak support, or a deteriorated subfloor. Hire a plumber for significant drain, vent, or supply-line changes.
Prioritize Ventilation and Moisture Control
Clean and evaluate the exhaust fan. Dust buildup can sharply reduce airflow. After safely disconnecting power, clean the grille and accessible housing according to the manufacturer’s instructions.
The fan must send moist air outdoors. It should not discharge into a ceiling, wall, or roof cavity. Check the exterior termination for blockage and make sure its damper operates freely.
Replace an ineffective fan with a compatible model. The existing duct, electrical supply, and exterior outlet must suit the replacement. Fan capacity, duct length, duct size, and bends all affect performance.
New wiring often requires a permit and licensed electrical work. A new exterior opening may also need approval from local officials or community management. Seal exterior penetrations with methods approved for the home and cladding.
Control water at the source. Repair dripping faucets and keep the shower curtain inside the basin. Wipe up repeated splashes around the vanity and toilet before they reach cabinet edges or floor seams.
If condensation continues during normal fan use, inspect the entire exhaust path. Damaged ducts, poor insulation, or a blocked termination can reduce performance. A larger fan alone may not solve the problem.
Layout Changes That Often Cost More Than They Save
Keep the toilet, sink, and shower in place. Reusing the plumbing layout limits the need to open walls and floors. This choice usually provides the largest budget savings.
Inspect existing plumbing before reusing it. Slow drains, leaks, sewer odors, and improvised fittings require attention. Moving drains or vents generally calls for a plumber and may require a permit.
Do not remove walls without an evaluation. A wall may support loads, brace the home, or contain utilities even when it looks thin. Ask a qualified contractor or engineer to evaluate it before alteration.
Structural changes can affect permits, inspections, and project costs. Gaining a few inches of floor space rarely justifies an unplanned framing repair.
Create visual space instead of structural space. Light paint, continuous flooring, a correctly sized mirror, and open space beneath a compact vanity can make the room feel less crowded. These updates preserve the original footprint.
Avoid oversized cabinets, mirrors, and storage units. They can interfere with the door, toilet clearance, airflow, or access to shutoff valves.
A Practical Order of Work
A clear work sequence protects new finishes and helps control costs. Start with leaks, soft flooring, mold, electrical concerns, and ventilation problems. Decide which fixtures can remain only after completing that inspection.
Confirm measurements, product compatibility, and permit requirements before placing orders. Pay close attention to tubs, toilets, vanities, doors, and wall panels with uncommon dimensions.
-
Document and measure the room. Record fixture dimensions, drain positions, wall thicknesses, stud locations, and door clearances. Check every proposed replacement against those measurements.
-
Investigate hazards and hidden damage. Test suspect older materials before disturbing them. Open damaged areas only after you understand the safety requirements and likely repair boundaries.
-
Complete permitted rough work. Finish structural, plumbing, ventilation, and electrical work before closing walls or floors. Schedule required inspections at the appropriate stages.
-
Repair the walls and subfloor. Replace unsound material and correct the moisture source. Finished surfaces need a dry, flat, and stable base.
-
Install flooring and fixed fixtures. Follow each manufacturer’s instructions and protect completed surfaces. Fixtures should sit firmly and align with connections without force.
-
Reconnect and test the plumbing. Turn on the water slowly. Check every joint during use and again after the system has remained under pressure.
-
Finish paint, trim, caulk, and accessories. Follow the stated drying and curing times. Confirm that doors, drawers, valves, and fixtures operate freely.
When to Hire a Professional
Call a plumber for relocated drains, damaged supply lines, recurring sewer odors, or widespread leaks. Seek help when connections will not align without force. A plumber should also handle major supply, drain, or vent changes.
Call an electrician for damaged wiring, aluminum wiring, scorched receptacles, or repeatedly tripped breakers. New circuits and wiring commonly require permits and licensed work. Never install a larger breaker to stop repeated tripping.
Hire a contractor for structural subfloor damage, sagging framing, major wall movement, or exterior-wall deterioration. Any proposed wall removal also needs professional evaluation. Heavy glass enclosures, tubs, and mirrored cabinets may require reinforcement and professional installation.
Widespread or recurring mold deserves professional assessment, especially when concealed water damage may feed it. Stop work if demolition exposes extensive rot, scorched materials, unidentified wiring, or suspect asbestos-containing products.
Leave gas lines and gas water-heater venting to licensed professionals. Errors can cause fire, gas leaks, or carbon monoxide exposure. This work usually requires a permit and inspection.
Spend First on the Parts That Keep the Room Dry
A successful mobile home bathroom remodel leaves the floor solid, the plumbing dry, and the exhaust fan vented outdoors. It also keeps cabinets and accessories firmly attached to suitable framing. These results matter more than expensive finishes.
Set aside part of the budget for damage found after removing the toilet, vanity, or flooring. Bathrooms often hide deterioration around pipe penetrations, wall edges, and fixture bases.
Reuse components that remain sound, but do not cover soft wood, active mold, leaking joints, or unsafe wiring. Keep the plumbing layout when possible, and assign specialized work to qualified trades. Then use paint, hardware, lighting, and practical storage to finish a bathroom that stays cleaner and easier to maintain.