This guide explains how to install Ring Doorbell on brick without drilling while avoiding unreliable bonds on rough masonry. For most brick homes, use an over-the-door clamp or attach an adhesive plate to smooth exterior trim. Do not rely on ordinary mounting tape pressed directly onto porous brick.
This project suits beginners who use a battery-powered Ring doorbell. The most common failure comes from attaching tape to uneven, dusty masonry. Moisture, temperature changes, and shallow mortar joints can weaken the bond without warning.
Skill level: Beginner for a battery model; intermediate when connecting existing doorbell wires
Active time: 30 to 60 minutes
Total time: 30 minutes to 48 hours, depending on the mount and adhesive cure time
Tools and Materials
- Ring video doorbell that supports battery operation
- Fully charged removable battery or doorbell unit, depending on the model
- Model-compatible no-drill plate, over-the-door enclosure, or clamp mount
- Exterior adhesive strips approved by the mount manufacturer
- Optional model-compatible wedge mount for adjusting the camera angle
- Tape measure
- Small level, such as a 6-inch torpedo level
- Pencil or removable painter’s tape for position marks
- Microfiber cloth
- Cleaner approved by the adhesive manufacturer
- Small Phillips screwdriver or the Ring-supplied driver
- Exterior adhesive cable clips for existing low-voltage wires
- Non-contact voltage tester if you will work near existing wiring
- Eye protection for cleaning loose or brittle masonry
- Stable stepladder if you cannot reach the mounting position from the ground
Before You Start
Measure the doorbell, mounting plate, and available flat surface before ordering a mount. Ring models have different dimensions, screw locations, battery access points, and camera positions. Reject any mount that blocks the motion sensor, speaker, security screw, or battery release.
Inspect the brick and surrounding trim closely. Raw brick and mortar have porous, dusty, and irregular surfaces, so adhesive pads rarely make full contact. Painted or sealed brick may look smoother, but weak paint or sealer can pull away with the mount.
Look instead for flat wood, vinyl, metal, or composite trim. Confirm that the mount manufacturer approves both the surface and outdoor use. The finish must also feel firm, clean, and smooth.
Check the door before choosing an over-the-door enclosure. The mount must fit the door thickness and clear the frame, locks, and weatherstripping. It must also let the door latch without extra force.
These mounts often work best with inward-opening doors. Their interior clamping section stays protected inside the home. However, the exact door design and mount still determine compatibility.
Use the Ring app to check the camera view before attaching anything. Hold the powered doorbell in place while another person watches Live View. Confirm that the frame shows visitors’ faces, the approach, and the package area.
Avoid aiming most of the frame at a nearby wall or busy street. Direct afternoon sun and bright porch lights can also reduce image quality. Test the view during daylight and, if possible, after dark.
If you plan to reuse existing wires, turn off power to the doorbell transformer at the breaker. Use a suitable tester according to its instructions before touching wires. If you cannot identify the circuit or verify safe conditions, call an electrician.
Doorbell wiring normally carries low voltage, but the transformer connects to household power. Old or altered systems may not match current diagrams. Running new wiring or adding a circuit may require a permit and licensed electrical work.
Review rental, condominium, homeowners association, and community rules before installation. Rules may restrict cameras in shared hallways or changes to the exterior. Position the camera to respect neighboring property and local privacy requirements.
How to Install Ring Doorbell on Brick Without Drilling
-
Choose the no-drill mounting method. Use an over-the-door mount if the door and frame provide enough clearance. Otherwise, attach a compatible adhesive plate to smooth exterior trim.
Avoid direct attachment to raw brick. Ordinary foam tape cannot maintain reliable contact across deep texture and mortar joints.
-
Charge and configure the doorbell. Fully charge the battery, install the Ring app, and connect the device to your Wi-Fi network. Complete the basic setup indoors.
Test Live View, audio, motion detection, and notifications before mounting the unit. Fix connection problems now, while you can move the doorbell easily.
-
Test the height and viewing angle. Hold the doorbell at the proposed location and check Live View. Do not rely only on a standard mounting-height recommendation.
Steps, sloped paths, narrow porches, and storm doors can change the best position. Mark the top and side with painter’s tape once the view looks correct.
-
Check door clearance. Move the main door and any storm or security door through their full travel. Watch for contact with handles, trim, weatherstripping, closers, and locks.
The door should open, close, and latch normally. Choose another position if the housing rubs or blocks movement.
-
Clean the attachment surface. Remove dust, pollen, wax, grease, and loose material. Use only a cleaner that the adhesive manufacturer approves for the surface.
Allow the area to dry completely. Do not sand old paint unless you know it contains no lead. Homes built before 1978 may require lead-safe work practices.
-
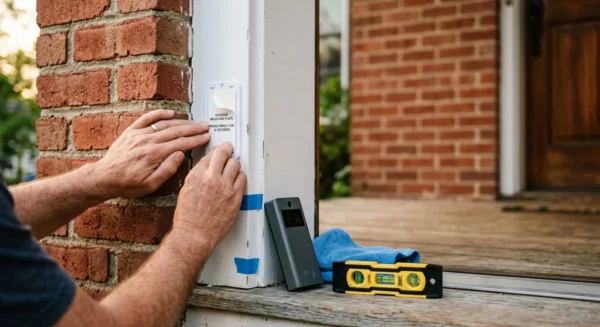
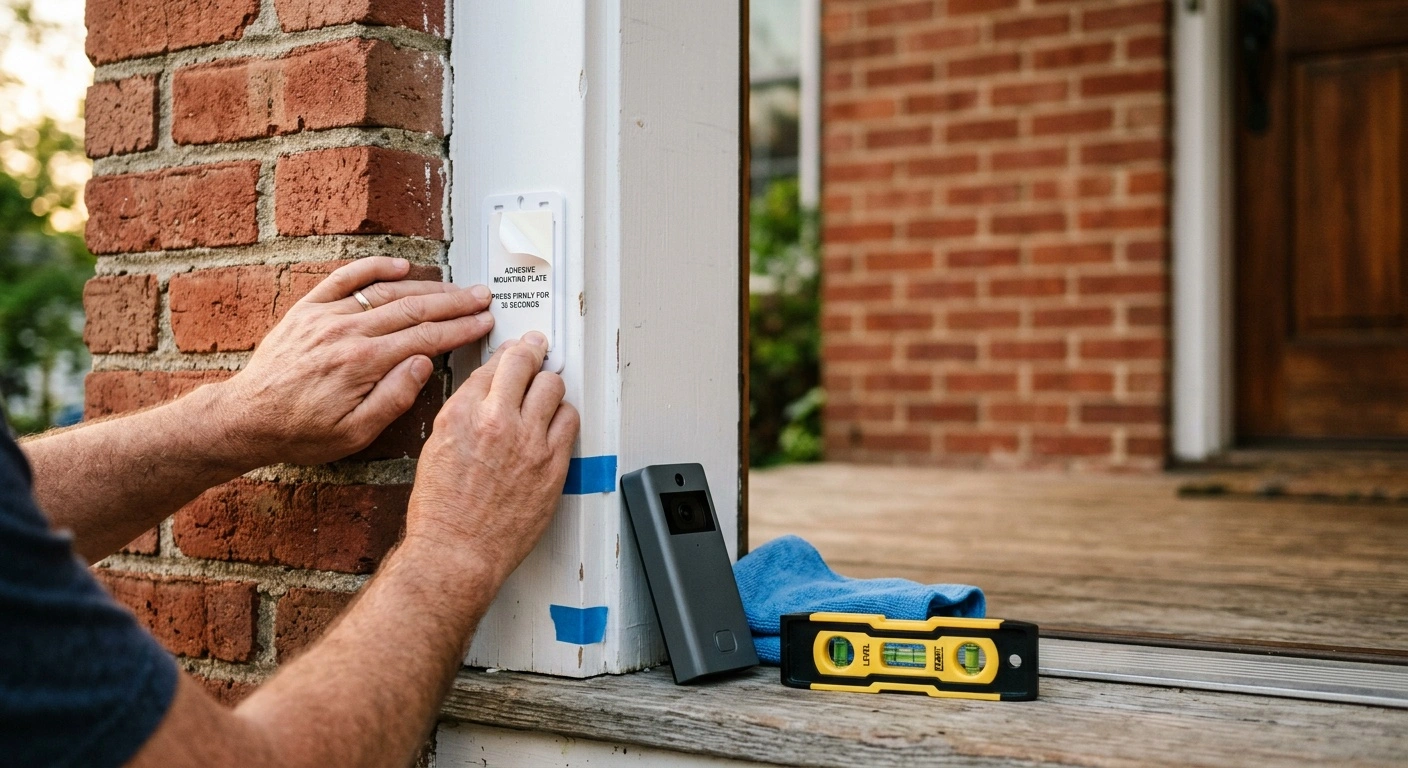
Dry-fit the mount. Place the empty plate or clamp at your marks without exposing the adhesive. Use a small level to keep the camera opening upright.
Add a compatible wedge if the wall angle points the camera toward the brick. The mount should sit flat and remain stable without rocking.
-
Attach the adhesive plate to approved trim. Remove the backing without touching the adhesive. Align the plate with your marks, then press it firmly for the manufacturer’s specified time.
Do not stack tape to bridge gaps in brick. A thick, flexible bond allows movement and increases the risk of peeling.
-
Install the clamp mount if you selected one. Place the protected inner section over the door edge. Position the camera enclosure on the exterior side.
Tighten only the supplied hand screw or adjustment mechanism. Excessive force can deform hollow metal, fiberglass, or thin-skinned doors.
-
Allow the adhesive to cure. Leave the plate unloaded for the manufacturer’s full curing period. Cool or humid conditions may extend that time.
Do not attach the doorbell simply because the adhesive feels sticky. Wait until the required time has passed and inspect every edge for lifting.
-
Connect existing wires only if the model supports them. Switch off power to the transformer before handling any wire. Follow the instructions for your exact Ring model, transformer, and chime.
Stop if you find corrosion, brittle insulation, damaged conductors, or an unidentified transformer. Secure each approved connection without leaving bare conductor outside the terminal.
-
Secure exposed low-voltage wire. Route the cable along smooth trim with exterior adhesive clips. Keep it away from sharp brick edges, hinges, latches, and door gaps.
Leave enough slack for service but avoid loose loops. The wire must remain clear whenever the door moves.
-
Place the doorbell in the mount. Seat the device in its bracket or enclosure. Install the supplied retaining screw or security screw.
Do not substitute a longer screw. It could contact the door, glass, wiring, or battery.
-
Test the finished installation. Restore power if you connected compatible existing wiring. Check the button, app, chime, speaker, microphone, Live View, and motion alerts.
Open and close the door several times. Gently press the mount from different directions. It should remain still while the door operates normally.
Which No-Drill Method Works Best on Brick?
Over-the-Door Mounts
An over-the-door mount usually provides the most dependable grip near rough brick. It wraps around or clamps to the door instead of relying on masonry adhesive. Many models also simplify battery removal and discourage casual theft.
Door compatibility remains the main limitation. Thick doors, tight jambs, storm doors, multipoint locks, and bulky weatherstripping may leave too little space. Never force the door closed against the mount.
A poor fit can damage the frame or prevent proper latching. It may also create an air or water leak around the door. Remove the mount if you notice rubbing or increased closing force.
Adhesive Mounts on Smooth Trim
An adhesive plate gives a low-profile installation when the brick opening has flat exterior trim. Suitable surfaces may include painted wood, metal, vinyl, or composite material. The manufacturer must approve the adhesive for that surface and outdoor exposure.
Check the mount’s load rating for the complete assembly. The rating must cover the plate, doorbell, battery, and any wedge. Review the approved temperature range as well.
The installation can only hold as well as the finish beneath it. Chalky paint, oxidized metal, loose vinyl wrap, and failing clear coat can separate from the base material. Test a hidden area first if you have concerns about stains or finish damage.
Adhesive Directly on Brick
Direct adhesive mounting on raw brick offers the least reliable no-drill option. Only the brick’s high points may touch the tape. The rest of the adhesive can span unsupported gaps.
Water may work behind the pad, while heat can soften the adhesive. The doorbell’s weight can then peel the mount away. Wind, button presses, and door vibration add repeated stress.
Some manufacturers approve specific systems for smooth, sealed masonry. Follow their surface and temperature requirements exactly. A product labeled for masonry may still stain brick or resist clean removal.
Construction adhesive can cause permanent damage and complicate future removal. If you lack smooth trim or a compatible clamp mount, consider a proper masonry installation. Two controlled anchor holes may prove safer than an improvised adhesive bond.
Common Installation Mistakes
Do not apply indoor picture-hanging strips to brick, even if the package calls them heavy-duty. Manufacturers base load ratings on specific surfaces and preparation methods. Those ratings rarely cover dusty masonry exposed to rain, sunlight, and temperature swings.
Adding more tape does not correct poor surface contact. Extra layers create a softer mounting point that can flex during use. That movement eventually weakens the edges.
Check the exact Ring model before buying a generic enclosure. A tight housing can block sensors, interfere with charging, trap water, or obstruct the security screw. A loose housing may shake whenever the door closes and trigger unwanted recordings.
Do not place the camera solely at the existing doorbell button’s location. A narrow brick return can dominate the image. It may also reflect infrared light into the lens at night.
Use Live View to decide whether you need a horizontal or vertical wedge. Make that decision before exposing any adhesive. Repositioning a used strip reduces its holding strength.
Avoid placing the camera behind a storm door without testing the full setup. Glass can create glare and reduce night-image quality. Metal framing may also weaken the Wi-Fi signal.
Finally, do not skip the adhesive cure period. Avoid pulling hard on a newly installed plate to test it. Inspect the edges and apply only light pressure after the specified curing time.
When to Call a Professional
Call an electrician if you find damaged wires, unexpected voltage, or repeated breaker trips. You should also call one if you cannot identify the transformer or chime wiring. Repeated faults indicate an electrical problem rather than a mounting problem.
Turn off the relevant breaker before anyone handles the wiring. Use an appropriate tester according to its instructions. Never open or modify the transformer’s household-voltage connections unless you have the proper training.
New wiring or a new circuit may require a permit. Local rules may also require a licensed electrician. Contact the local building department before expanding the system.
Hire an installer or mason if the only usable location has deteriorated brick or crumbling mortar. Loose veneer, cracked stone, and unstable masonry cannot support a dependable mount. Falling equipment may damage the entry or injure someone.
Cracks that cross several bricks or continue to change need further evaluation. Treat them as a building issue, not a mounting inconvenience. Do not cover them with a doorbell plate.
Professional help also makes sense when the location requires an extension ladder or access above steep steps. Set an extension ladder at a 4-to-1 angle and maintain three points of contact. Extend it 3 feet above an upper landing when you use it for access.
Never stand on the top step or rung. Avoid ladder work during wet, windy, or icy conditions. A safer mounting location is better than a risky installation.
Maintaining a No-Drill Ring Doorbell Mount
Inspect the mount monthly during the first season. Check it again after severe weather or major temperature changes. Look for lifted edges, trapped water, movement, cracked plastic, and rusting hardware.
Pressing the doorbell button should not make the plate flex or rock. Remove the device if the mount starts moving. Replace the adhesive or choose a different mounting method.
Clean the lens and motion sensor with a soft cloth. Remove cobwebs, pollen, and dust without soaking the housing. Do not spray the mount with a hose or harsh cleaner.
If water repeatedly runs behind an adhesive plate, move the mount to a more protected location. Do not try to seal every edge with caulk. Trapped moisture can still weaken the finish or adhesive.
Check door clearance after replacing weatherstripping, locks, or a storm door. Small frame changes can make a clamp rub. Tighten the mount only according to its manufacturer’s instructions.
Never reuse adhesive strips after removing the plate. Clean away residue with a product approved for the trim finish. Inspect for loose paint or damage before installing new strips.
Recharge the battery before it becomes fully depleted. This reduces gaps in recording while the battery charges. Follow the Ring app’s battery alerts and maintenance guidance.
Choose the Surface Before You Choose the Mount
In most homes, learning how to install Ring Doorbell on brick without drilling leads to one practical choice. Attach a compatible clamp to the door or place an approved adhesive plate on smooth, sound trim. Both methods provide a more predictable hold than tape on rough brick.
Test the camera view, Wi-Fi connection, door clearance, and mount stability before committing to the location. Follow the manufacturer’s cleaning, temperature, pressure, and cure instructions. Avoid improvised layers of tape or permanent construction adhesive.
If you only have crumbling masonry, use a qualified installer or mason. Bring in an electrician when the project involves damaged wiring, an unknown transformer, or a new circuit. A secure installation should protect the doorbell without creating a new safety problem.