Learning how to install soft close hinges starts with choosing a hinge that matches the cabinet construction, door position, and existing cup holes. Careful installation matters because small errors can leave a door crooked, binding, or unable to close.
This guide explains how to install soft close hinges on common kitchen and bathroom cabinets. Replacing compatible European-style hinges is usually straightforward because you may reuse the existing holes. Converting exposed hinges requires more measuring and drilling. It may also leave old screw holes visible.
Skill level: Beginner for a compatible hinge replacement; intermediate for a new concealed-hinge conversion. Active time: About 20 to 45 minutes per door. Total time: About half a day for a small kitchen, depending on the door count and drilling required.
Tools and Materials
- Soft-close concealed hinges that match the cabinet type, door thickness, and overlay
- Compatible mounting plates, unless the hinges include them
- Manufacturer-approved drilling template or concealed-hinge jig
- Drill/driver with an adjustable clutch
- 35 mm Forstner bit for hinges that require a standard 35 mm cup
- Small drill bit sized for the supplied screws
- Phillips or Pozidriv screwdriver that fits the hinge screws
- Combination square or small try square
- Tape measure
- Sharp pencil or marking knife
- Painter’s tape
- Awl or self-centering hinge bit
- Depth stop, drill press, or jig for controlling cup-hole depth
- Two clamps and a scrap backer board
- Wood filler or glued hardwood toothpicks for loose screw holes
- Safety glasses
- Hearing protection for loud power tools
- Dust mask or respirator when drilling MDF or other dusty sheet material
Before You Start
First, identify whether the cabinet has face-frame or frameless construction. Face-frame cabinets have a solid wood frame around the front of the box. Frameless cabinets hold the doors directly on the cabinet sides. Choose hinges and mounting plates made for your cabinet construction.
Next, determine whether each door has a full overlay, partial overlay, or inset position. A full-overlay door covers most of the cabinet edge or frame. A partial-overlay door covers only part of it. An inset door sits inside the opening.
Measure the overlay instead of judging it by eye. Compare that measurement with the hinge manufacturer’s specifications.
Remove one existing hinge before buying a complete set. Check the cup diameter, cup depth, screw spacing, and mounting-plate pattern. Hinges with identical cup diameters are not always interchangeable. Arm geometry and plate height also control the final door position.
Check the door thickness against the hinge specifications. Pay close attention to thin doors, glass-frame doors, and doors with deep edge profiles. A cup hole that is too deep can break through the front.
Open the cabinet and inspect the interior. Shelves, pullouts, drawer slides, and trim can interfere with the hinge arm. Make sure the soft-close mechanism has enough clearance throughout the door’s full swing.
Label paired doors and their locations with painter’s tape. Similar-looking doors may have different adjustments for an uneven cabinet opening.
- Count the existing hinges and use at least the same number of compatible replacements.
- Follow the manufacturer’s guidance for tall, wide, or heavy doors.
- Confirm that each door is flat, stable, and free from structural damage.
- Test one questionable cup hole before ordering or opening the full hinge set.
- Protect countertops and floors from doors, screws, and drilling debris.
- Read the hinge and jig instructions before drilling. Setback and cup depth vary by system.
How to Install Soft Close Hinges
Install and adjust one test door before changing every hinge in the room. This test confirms the hinge style, mounting plate, and overlay. It also gives you a reference for the remaining doors.
Keep each door’s hinges and plates together. Do not mix hardware from different systems unless the manufacturer approves the combination. Use a hand screwdriver for final tightening because a drill can strip particleboard or MDF quickly.
Wear eye protection while drilling. Clamp the door securely and follow the instructions for the hinge, jig, and drill bit.
- Label and remove the door. Support the door or ask a helper to hold it. Release the clip-on hinges or remove the mounting screws. Lay the door face down on a padded, stable surface.
- Remove the old hinges and inspect the holes. Back out the cup and plate screws carefully. Check for cracks, swelling, stripped holes, or crumbling particleboard. Reuse a hole only when solid material still grips the screw.
- Repair loose screw holes. Fill minor damage with glued hardwood toothpicks or a suitable wood repair product. Trim the repair flush and let the adhesive cure fully. Then drill a correctly sized pilot hole.
- Test-fit a new hinge in an existing cup. Seat the hinge without forcing it. The cup should sit flat, and the flange should not rock. Its screw holes should align without pulling the hinge sideways.
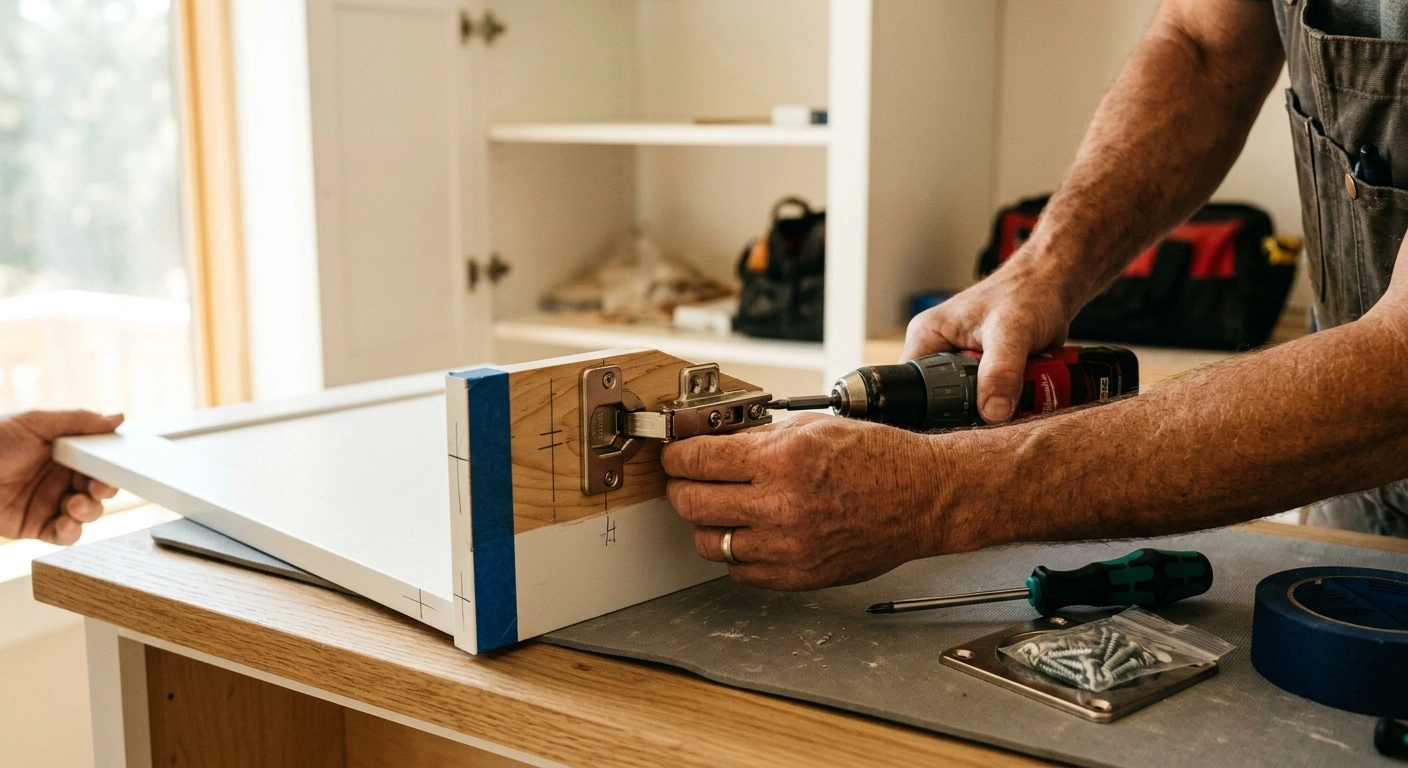
- Mark new cup locations if necessary. Place the manufacturer’s template or jig against the hinge edge. Mark each center at the specified setback and spacing. Check the marks with a square before drilling.
- Bore the hinge cups. Clamp the door over a scrap backer board. Set the jig or depth stop, then drill perpendicular to the surface. Stop when the cup sits flush in the hole. Check the door face for a bulge before drilling farther.
- Drill the hinge screw pilot holes. Place the hinge in its cup and square it to the door edge. Start the holes with an awl or self-centering bit. Drill shallow pilots sized for the supplied screws.
- Fasten the hinges to the door. Drive the screws with a low clutch setting. Finish tightening them by hand. The flanges should sit flat without crushing the door material.
- Position the mounting plates. Reuse existing holes only when the new plates share the same geometry. Otherwise, mark new locations with the manufacturer’s template. Keep every plate parallel to the cabinet front.
- Fasten the mounting plates. Drill suitable pilot holes and install the screws. Avoid overtightening them in particleboard or thin face-frame stock. Each plate should remain firm under hand pressure.
- Attach the door. Ask a helper to support large or heavy doors. Clip or screw each hinge arm onto its plate. Confirm that every connection has latched before releasing the door.
- Adjust the side-to-side position. Turn the lateral adjustment screw in small increments. Aim for even gaps between doors and cabinet edges. Make sure paired doors do not rub.
- Adjust the height. Support the door before loosening any plate screws that slide. Move the door until its edges align with neighboring doors. Retighten the screws by hand.
- Adjust the depth. Move the door inward or outward with the depth screw. Match the plane of nearby doors and check the hinge-side clearance. The door should close without scraping.
- Set and test the soft-close action. Choose a damping setting if the hinge offers one. Open and close the door several times from different angles. The damper should catch the door and pull it fully closed without help.
Adjusting Doors That Do Not Close Correctly
Most concealed hinges provide separate side, depth, and height adjustments. However, screw positions vary by manufacturer. Change one setting at a time, then test the door. Small turns make troubleshooting easier.
Use the side adjustment when a door rubs against its neighbor. If the top edge looks crooked, make small changes at both hinges. Avoid forcing one hinge to handle the entire correction.
A door that stands proud of the cabinet usually needs a depth adjustment. Before turning the screw, check for contact with a shelf, pullout, bumper, or trim piece.
If the door slows down but stops short, reduce the damping setting when possible. Light or narrow doors may lack enough momentum for a strong setting. Also check for thick bumpers, warped wood, rubbing edges, or an unseated hinge arm.
- Problem: The door drops after several uses. Cause: Loose plate screws or damaged cabinet material. Fix: Support the door, repair stripped holes, and readjust the height.
- Problem: The door snaps shut. Cause: The damper is off, disengaged, or defective. Fix: Check the setting and engagement. Replace the hinge if the damper still fails.
- Problem: The door will not open fully. Cause: The opening angle is too narrow, or trim blocks the arm. Fix: Remove safe obstructions or choose a hinge with suitable geometry.
- Problem: Paired doors overlap. Cause: The overlay, plate height, or side adjustment is incorrect. Fix: Confirm the hinge model before exceeding its adjustment range.
- Problem: A screw spins without tightening. Cause: The hole is stripped or the cabinet material has deteriorated. Fix: Stop driving the screw and repair the hole before reinstalling it.
Common Soft-Close Hinge Installation Mistakes
Drilling through the door face causes the most expensive damage. Measure the actual door thickness and confirm the required cup depth. Use a physical depth stop rather than judging depth by feel. Test the setup on scrap material of equal thickness when possible.
Do not choose hinges by cup diameter alone. Cabinet construction, overlay, opening angle, plate height, screw pattern, and door thickness all matter. A hinge may fit the cup but hold the door in the wrong position.
Adjustment screws cannot correct badly placed cups or mounting plates. They provide fine alignment rather than major layout correction. If a screw reaches the end of its travel, check the hardware and measurements again.
Overtightening screws can damage particleboard and MDF. Use the drill only to bring each screw close. Finish by hand until the hardware feels snug.
Avoid combining hinges and plates from different product lines. Use mixed components only when the manufacturer confirms compatibility.
When to Call a Professional
Call a cabinet installer or finish carpenter for expensive, veneered, glass-fronted, or heavily profiled doors. One misplaced cup can ruin a thin face or break through a routed panel. Professional boring equipment also helps with large, precise conversions.
Get help when cabinet sides have split, swollen, or deteriorated. Moving a mounting plate will not restore weak material. A falling door can injure someone and damage the surrounding cabinets or countertop.
Cabinet repair may require reinforcement blocks, a replacement side panel, or a different hinge system. Repair the structure before installing new hardware.
Oversized pantry doors, lift-up doors, mirrors, and glass inserts need special care. These assemblies may require heavy-duty hinges and two-person handling. Follow the door manufacturer’s hardware requirements.
Stop drilling if you encounter unexpected metal, wiring, or another concealed obstruction. Identify it before continuing. Built-in cabinets near plumbing, masonry, or appliances can conceal services behind their panels.
Ongoing Hinge Maintenance
Soft-close hinges need little maintenance. Check them when a door starts sagging, rubbing, or closing differently. Tighten loose fasteners by hand before changing the alignment.
Repair any screw hole that loosens repeatedly. Do not install a longer or wider screw without checking the cabinet thickness. An oversized screw may penetrate the side or strike interior hardware.
Wipe dust and cooking residue away with a soft, slightly damp cloth. Do not soak the mechanism or spray cleaner into the damper. Add lubricant only when the hinge manufacturer recommends a specific product.
Test every door a few weeks after installation. Screws can settle into softer cabinet materials. Check the gaps, alignment, and closing action, then make small corrections as needed.
Replace any hinge with a cracked arm, damaged plate, leaking damper, or loose pivot. Match the existing model and plate geometry whenever possible. Different damping strengths on one door can create uneven movement.
Start With One Test Door
The key to how to install soft close hinges correctly is careful hardware selection and accurate layout. Match the cabinet construction, overlay, door thickness, cup dimensions, and mounting plate before buying a full set.
Complete one door from removal through final adjustment. If it hangs square and closes fully, use it as the reference for the other cabinets.
Keep your measurements consistent and control the drilling depth. Never force screws into weak material. Each finished door should have even gaps, move without rubbing, and close quietly without a final push.