Learn how to install a water heater expansion tank and set its air charge correctly. The tank controls pressure increases as heated water expands inside a closed plumbing system. Before starting, check local plumbing codes and the water heater manufacturer’s instructions.
This project requires basic plumbing skills and careful pressure testing. Hire a licensed plumber if you cannot identify the correct connection point or safely modify the cold-water line.
Why a Water Heater Needs an Expansion Tank
Water expands as it heats. In an open plumbing system, that extra volume can move back toward the municipal supply. A check valve, backflow preventer, or pressure-reducing valve may block that route and create a closed system.
An expansion tank gives the extra water a place to go. Inside the tank, a flexible diaphragm separates the water from a pressurized air chamber. This setup helps limit pressure swings and protects valves, fixtures, and the water heater.
Signs of thermal expansion include dripping from the temperature and pressure relief valve, changing water pressure, or short bursts from faucets. However, these symptoms can also indicate other plumbing problems. Test the system before assuming an expansion tank will fix them.
Choose the Correct Expansion Tank
Select a tank approved for potable water and rated for your system’s temperature and pressure. Do not substitute a hydronic heating expansion tank. Hydronic models may use materials that do not meet drinking-water standards.
Use the manufacturer’s sizing chart rather than guessing. The correct size depends on the water heater’s capacity, supply pressure, starting water temperature, and maximum operating temperature. A larger heater or higher supply pressure usually requires a larger tank.
Check your home’s static water pressure with a hose-thread pressure gauge. Attach it to a hose bib or laundry connection, turn off all fixtures, and read the gauge. Test at different times because municipal pressure can change during the day.
If the pressure exceeds the local limit, address that problem before installing the tank. Many United States plumbing codes set 80 psi as the maximum building supply pressure. A plumber may need to install, adjust, or replace a pressure-reducing valve.
Tools and Materials
- Potable-water expansion tank in the correct size
- Hose-thread water pressure gauge
- Tire pressure gauge
- Hand pump or small air compressor with a regulator
- Pipe tee and compatible adapters
- Approved thread sealant or PTFE tape
- Pipe cutter or tubing cutter
- Adjustable wrenches or pipe wrenches
- Bucket and towels
- Tank bracket or other approved support
- Safety glasses and work gloves
Your exact fittings will depend on copper, PEX, CPVC, or galvanized pipe. Use fittings approved for the pipe material and potable water. Follow required clearance rules near the water heater, especially when working with plastic pipe.
Step by Step: how to install a water heater expansion tank
The details of how to install a water heater expansion tank depend on your pipe material and local code. In most systems, the tank connects to the cold-water supply between the water heater and any device that closes the system. Follow the tank manufacturer’s instructions for orientation and support.
1. Shut Down the Water Heater
For an electric water heater, switch off the correct circuit breaker. For a gas model, follow the manufacturer’s shutdown procedure. Do not rely only on a wall switch or thermostat setting.
Close the cold-water supply valve to the heater. If that valve does not hold, shut off the home’s main water supply. Open a nearby hot-water faucet to relieve pressure.
2. Confirm the Installation Location
Locate the cold-water line feeding the heater. The expansion tank normally connects downstream of the check valve, backflow preventer, or pressure-reducing valve. It must remain on the same closed side as the water heater.
Choose a spot with enough clearance for the tank and future replacement. Keep the tank accessible so you can test its air charge. Never block the water heater’s temperature and pressure relief valve or discharge pipe.
3. Drain Enough Water to Open the Line
Connect a hose to the heater’s drain valve if you need to lower the water level. Drain only enough water to prevent spills when you cut the cold-water line. Direct hot water to a safe location and avoid contact with skin.
Confirm that the line has no pressure before cutting it. Place a bucket and towels beneath the work area. Residual water may still drain from the pipe.
4. Set the Tank’s Air Precharge
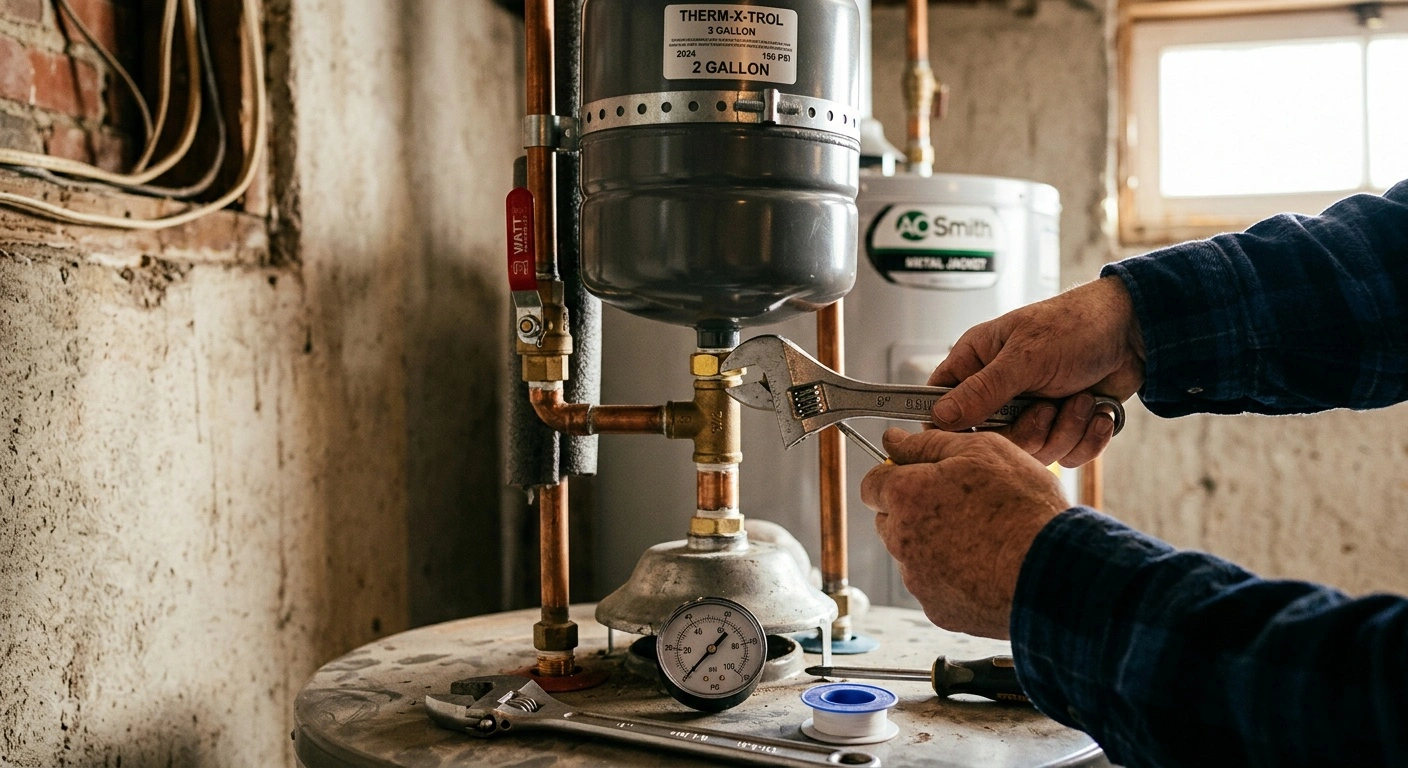
Check the expansion tank’s air pressure before connecting it to the plumbing. Remove the cap from the Schrader valve and use a reliable tire pressure gauge. The water side of the tank must contain no pressure during this test.
Match the tank’s air precharge to the home’s measured static water pressure unless the manufacturer specifies otherwise. Add air with a hand pump or regulated compressor. Press the valve briefly to release air if the pressure is too high.
Do not exceed the tank’s pressure rating. If water comes out of the Schrader valve, the internal diaphragm has failed. Replace the tank instead of installing or reusing it.
5. Install the Tee and Fittings
Cut the cold-water pipe at the planned connection point. Install a tee that matches the pipe material and directs the branch toward the expansion tank. Clean, deburr, and prepare the pipe according to the fitting manufacturer’s directions.
If you solder copper, assemble and cool the tee before attaching the tank. Keep torch heat away from the tank, valves, insulation, and combustible surfaces. Use a heat shield where needed.
For PEX, CPVC, or press-connect systems, use listed fittings and the correct installation tools. Observe any required distance between plastic pipe and the water heater connection. Local code may require a metallic transition section.
6. Connect and Support the Expansion Tank
Apply approved thread sealant to male pipe threads, keeping excess material out of the waterway. Thread the tank into its adapter and tighten it with a wrench on the proper fitting. Do not twist the tank body to tighten the connection.
Support the tank with a listed bracket, strap, or other manufacturer-approved method. A water-filled tank can place substantial weight on the pipe. Do not expect the branch pipe to carry that load by itself.
Some manufacturers allow several mounting positions, while others specify a particular orientation. Follow the instructions supplied with your model. Position the Schrader valve where you can reach it for future service.
7. Refill the System and Check for Leaks
Close the drain valve if you opened it. Slowly open the cold-water supply while leaving a hot-water faucet open. Let the faucet run until water flows steadily and all air leaves the line.
Inspect the tee, adapters, and tank connection for leaks. Tighten threaded joints carefully if needed. Repair any leaking soldered, pressed, or plastic fitting according to its installation method.
8. Restore Power or Gas
Restore electricity only after the tank has filled completely and the open hot-water faucet produces a steady flow. Energizing an empty electric heater can destroy its heating elements. Close the faucet after purging the air.
For a gas water heater, follow the manufacturer’s lighting and startup instructions. Confirm that the vent, burner area, and gas controls remain undisturbed. Contact a qualified technician if you smell gas or notice venting problems.
Test the Finished Installation
Run enough hot water to make the heater complete a full heating cycle. Watch the system pressure with a pressure gauge that records peak pressure, if available. The pressure should remain below the ratings of the tank, heater, fixtures, and local code limit.
Check every new joint again after the water reaches operating temperature. Look for moisture around the expansion tank connection and tee. Also inspect the temperature and pressure relief valve for continued dripping.
A relief valve that still leaks may have mineral buildup, damage, or an incorrect pressure rating. Never cap or plug its discharge line. Ask a licensed plumber to diagnose persistent leakage or excessive pressure.
Expansion Tank Maintenance
Check the expansion tank during routine water heater maintenance. To measure the air charge accurately, shut off the water and relieve pressure from the water side first. Then compare the air reading with the home’s static water pressure.
A tank that sounds completely solid when tapped may contain water because its diaphragm has failed. Water at the Schrader valve confirms internal failure. Replace the tank promptly and support the new one correctly.
Inspect the mounting hardware, pipe connection, and surrounding area for corrosion or leaks. Do not paint over the label or pressure rating. Keep the valve accessible for later testing.
Finish the Job Safely
Proper sizing, matched air pressure, and firm support determine how well the tank controls thermal expansion. A poor connection or incorrect precharge can leave the system exposed to pressure spikes.
Stop and call a licensed plumber if the piping lacks a clear installation point or shows heavy corrosion. Professional help also makes sense when local code requires a permit or inspection. A careful installation protects the water heater without masking a larger pressure problem.