Before diving into the kitchen backsplash installation process, it’s essential to understand the wide variety of backsplash options available. Backsplashes are made from materials such as ceramic tile, glass, natural stone, metal, and even peel-and-stick designs. Each material has unique qualities: ceramic tiles are versatile and budget-friendly, glass tiles reflect light and add a modern touch, stone tiles like marble or granite bring natural beauty and durability, and metal backsplashes create a sleek, industrial vibe. When selecting your backsplash, consider your kitchen’s design style, the amount of wear and tear the area will experience, and how easy the material will be to clean and maintain. Choosing the right backsplash ensures it complements the kitchen’s overall aesthetic while meeting your functional needs.
Tools and Materials Needed
Gathering all the tools and materials before starting your backsplash installation can save time and prevent interruptions. Essential items include the tiles of your choice, tile adhesive or mastic, grout, a notched trowel for spreading adhesive, and spacers to ensure even tile spacing. A tile cutter or wet saw is crucial for precise cuts around outlets or edges. Other important tools include a level to keep your installation straight, a grout float for applying grout, a sponge for cleaning excess grout, and a bucket for mixing materials. Optional but useful items include a waterproofing membrane for added protection and tile edge trim for a polished finish. Having everything prepared ensures the process is efficient and smooth.
Preparing the Wall for Installation
Proper wall preparation is one of the most critical steps in ensuring a durable and visually pleasing backsplash installation. Begin by thoroughly cleaning the wall to remove grease, dust, or debris, as these can affect the adhesive’s grip. If the wall is painted, lightly sand it to create a rough surface for better adhesion. For drywall, consider applying a waterproofing membrane to protect against moisture, especially in areas near sinks or stoves. Mark your starting point, typically the center of the wall or a focal point, and use a level to draw straight horizontal and vertical guidelines. These lines will act as a visual aid, keeping your tiles perfectly aligned as you work across the surface.
Applying the Tile Adhesive
Mix the tile adhesive according to the manufacturer’s instructions, ensuring a smooth consistency that spreads easily. Using a notched trowel, apply the adhesive to the wall in small, manageable sections to prevent it from drying out before tiles are placed. Hold the trowel at a 45-degree angle to create even ridges in the adhesive, which improves the tiles’ grip. Cover only the area you can tile within 15 to 20 minutes to ensure optimal adhesion. Pay attention to corners, edges, and other hard-to-reach areas, as consistent coverage is key to a secure backsplash.
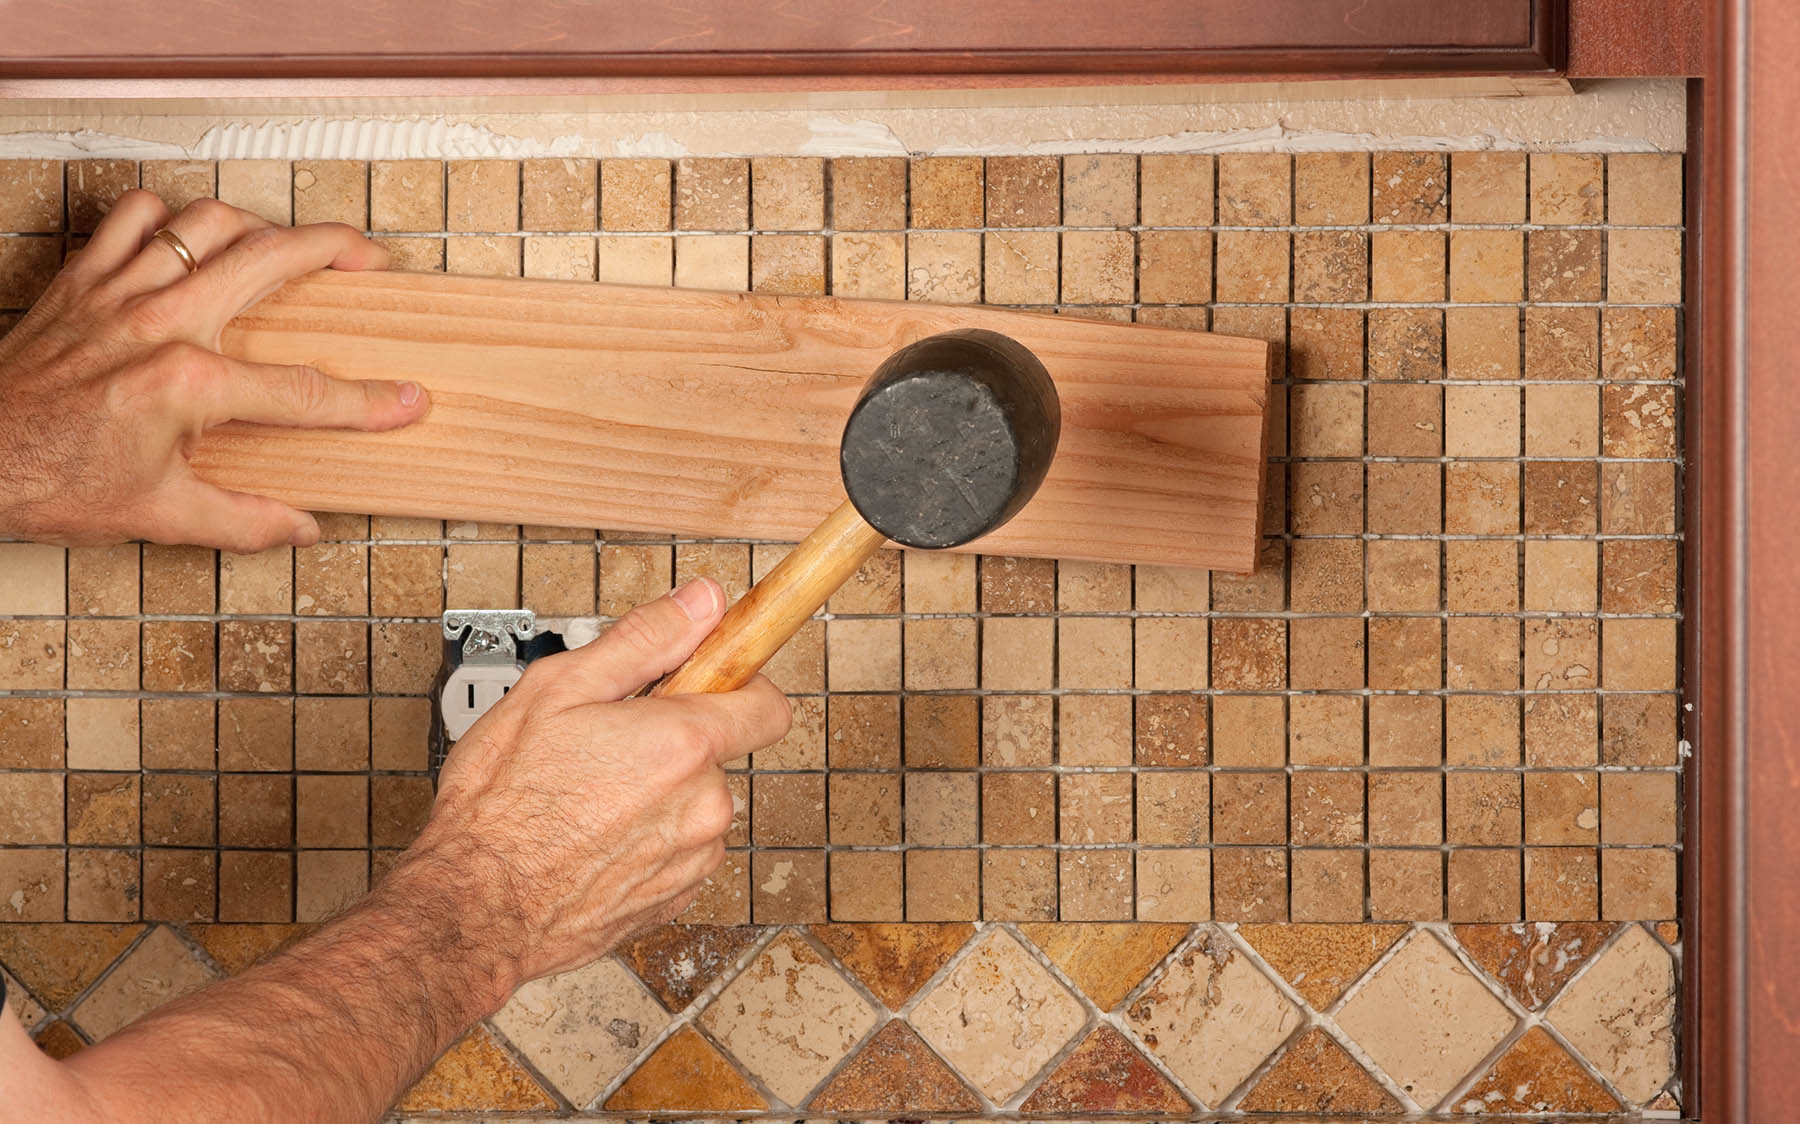
Laying the Tiles
Begin laying the tiles from your marked starting point, pressing each one firmly into the adhesive to ensure it adheres properly. Use spacers between tiles to maintain even spacing and achieve a uniform look. Work row by row, checking with a level regularly to ensure your tiles are straight and aligned. For tiles that need cutting—such as those at the edges or around outlets—measure carefully and use a tile cutter or wet saw to achieve clean, precise cuts. Take your time during this step, as proper alignment and spacing are crucial to the overall appearance of your backsplash.
Grouting the Tiles
Once the adhesive has dried completely—usually after 24 hours—remove the spacers and prepare to grout. Mix the grout according to the instructions, ensuring it has a smooth consistency. Using a grout float, apply the grout at an angle to the tile surface, working it into the spaces between the tiles. Be thorough to avoid gaps or air pockets. After applying the grout, wipe away excess material with a damp sponge, being careful not to remove too much grout from the joints. Rinse the sponge frequently to keep it clean and effective. Allow the grout to dry according to the manufacturer’s recommendations, typically 24 to 72 hours.
Sealing and Finishing
Sealing the grout is a vital step in protecting your backsplash from moisture, stains, and everyday wear and tear. Choose a high-quality grout sealer and apply it evenly over the grout lines, ensuring full coverage. In kitchens, where the backsplash is frequently exposed to cooking splatters, water, and grease, sealing helps maintain its appearance and durability over time. After sealing, inspect your work for any imperfections or areas that need touch-ups. If you’ve chosen tile edge trim, install it now for a finished, professional look.
Cleaning and Maintenance
To keep your backsplash looking fresh and new, regular cleaning and maintenance are essential. Use a mild, non-abrasive cleaner to wipe down the tiles and grout. Avoid harsh chemicals or abrasive sponges that could damage the surface. Pay special attention to areas behind the stove or sink, as these are more prone to grease and water stains. Periodically inspect the grout for cracks or discoloration and reapply grout sealer every year or two to maintain its protective barrier. Proper care ensures your backsplash remains a beautiful focal point in your kitchen for years to come.
Customizing Your Backsplash Design
A backsplash is not just functional—it’s an opportunity to express your personal style. Consider mixing tile colors, sizes, or materials to create a one-of-a-kind design. For example, a mosaic pattern can add visual interest, while a bold, single-color backsplash can create a dramatic effect. You might also incorporate decorative trim tiles, metallic accents, or a contrasting grout color for added flair. Personalizing your backsplash allows you to make your kitchen uniquely yours while elevating its aesthetic appeal.
Enjoying Your New Kitchen Backsplash
With your backsplash installation complete, take a moment to admire the transformation. A well-designed and expertly installed backsplash not only enhances your kitchen’s appearance but also improves its functionality by protecting the walls from moisture and stains. Whether you chose a classic design or a bold statement piece, your new backsplash is a testament to your hard work and creativity. Enjoy the renewed beauty and practicality it brings to your kitchen every day.