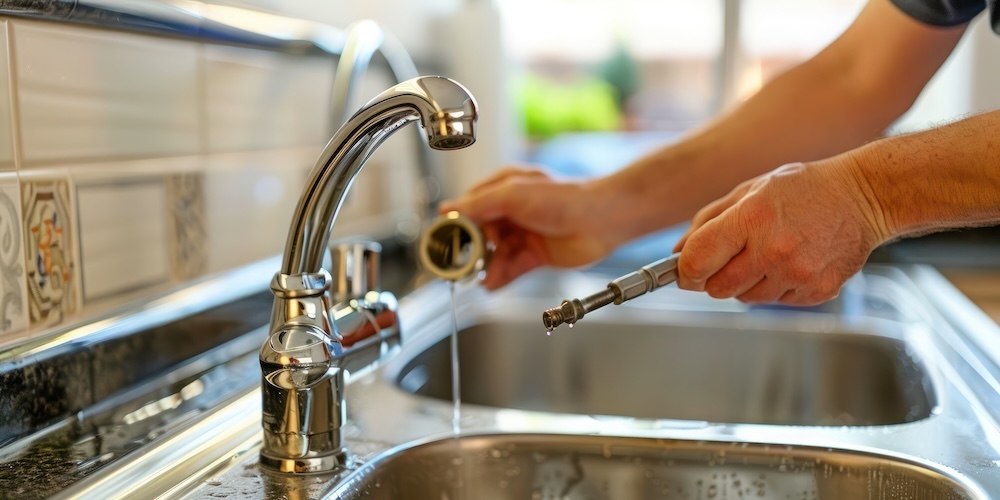
A dripping kitchen faucet is not only annoying but can also waste a surprising amount of water over time. Knowing how to repair a leaky kitchen faucet can save you money on your water bill and prevent further damage to your plumbing. The good news is that many leaks are caused by simple issues like worn-out washers or seals, and with a few basic tools, you can fix them yourself. This guide will walk you through how to repair a leaky kitchen faucet step by step, helping you restore your faucet to perfect working condition.
1. Identify the Type of Faucet
The first step in learning how to repair a leaky kitchen faucet is identifying your faucet type. Common types include compression, cartridge, ball, and ceramic disc faucets. Each has a slightly different mechanism and repair method, so knowing which one you have will guide your next steps.
2. Turn Off the Water Supply
Before attempting any repair, make sure to turn off the water supply under the sink. Open the faucet to release any remaining water and relieve pressure. This step is crucial to avoid water spills while you work on fixing your leaky faucet.
3. Disassemble the Faucet
Next, carefully remove the faucet handle(s). Depending on your faucet type, this might involve unscrewing a cap or using an Allen wrench to loosen set screws. Once the handle is off, you can access the internal parts responsible for the leak.
4. Inspect and Replace Worn Parts
Leaks often come from damaged washers, O-rings, or cartridges. Examine these parts closely for cracks, corrosion, or wear. If you spot damage, replace the faulty part with an exact match from a hardware store. This step is key in how to repair a leaky kitchen faucet.
5. Clean and Lubricate Components
Before reassembling, clean the faucet parts with vinegar or a gentle cleaner to remove mineral buildup. Apply plumber’s grease to O-rings and moving parts to ensure smooth operation and prevent future leaks.
6. Reassemble and Test
Put your faucet back together in the reverse order of disassembly. Turn the water supply back on and slowly test the faucet for leaks. If the dripping has stopped, congratulations — you’ve successfully completed how to repair a leaky kitchen faucet!
7. When to Call a Professional
If you’ve followed these steps and the leak persists, or if the damage is extensive, it may be time to call a plumber. Knowing how to repair a leaky kitchen faucet helps you identify when professional help is needed to avoid costly damage.
Final Fix
Learning how to repair a leaky kitchen faucet is a handy skill that can save you time, money, and frustration. With some basic tools and a bit of patience, you can fix common leaks and keep your kitchen running smoothly. Don’t let a drip turn into a flood — tackle the repair early and enjoy peace of mind.