How to Fix Gouges in Hardwood Floors: Understanding the Challenge
Learning how to fix gouges in hardwood floors is a skill every homeowner should master. Whether you’re returning from months abroad or cleaning up after a busy weekend with family, discovering damage on your beautiful wood floors can be frustrating. But with the right know-how, you can restore your floors without calling in a pro. It’s not just about keeping them pretty — it’s about protecting your investment and preserving the comfort of your home.
Gouges can happen anytime. Maybe you dragged furniture during a quick room refresh, or your dog skidded around a corner too fast. No matter if you’re in a Craftsman bungalow in Portland or a cozy chalet in Park City, fixing gouged hardwood floors is possible with a little time, patience, and a few essential tools.
Assessing the Damage: Light Scratches vs. Deep Gouges
Before you gather supplies, figure out the level of damage. Superficial scratches may only ruin the finish, while deeper gouges slice into the wood itself. These are easily spotted — you’ll often see a rough edge or lighter wood where the stain is missing.
Take, for example, a charming innkeeper in Asheville, North Carolina. After moving an antique bed, they noticed a 2-inch gouge in their white oak floor. It wasn’t something a quick polish could hide. But with the right steps, they restored it beautifully, no expert needed.
As a rule of thumb: if the gouge is less than 1/8 inch deep and limited to one plank, it’s DIY-able. Larger or deeper gouges across multiple boards may require advanced repair or refinishing techniques.
DIY Floor Repair: Tools and Materials You’ll Need
If you’re ready to fix gouges in hardwood floors yourself, gather your tools first. Most are affordable and available at any hardware store. Here’s what to stock in your toolbox:
- Hardwood floor filler or wood putty (match the shade to your floor)
- Plastic putty knife or scraper
- Fine-grit sandpaper (180–220 grit)
- Clean tack cloth or microfiber rag
- Matching stain or finish (e.g., polyurethane, oil, or wax)
- Painter’s tape (optional for masking nearby boards)
- Wood stain marker or blending pencil for fine-tuning color
For custom help, visit a local retailer like Cole Hardware in San Francisco or Black’s Home & Building Center in Colorado. Staff at these shops know how to match stains to unique local floor species like pecan, hickory, or heart pine.
Step-by-Step: How to Fix Gouges in Hardwood Floors
This hands-on guide will walk you through the proven process of repairing your gouged hardwood floors — whether you’re in a rustic cabin in the Catskills or a modern condo in Austin.
- Clean the Area: Wipe the gouged area with a damp cloth to remove dust and debris. A clean surface ensures good filler adhesion. Avoid harsh cleaners that might affect future refinishing.
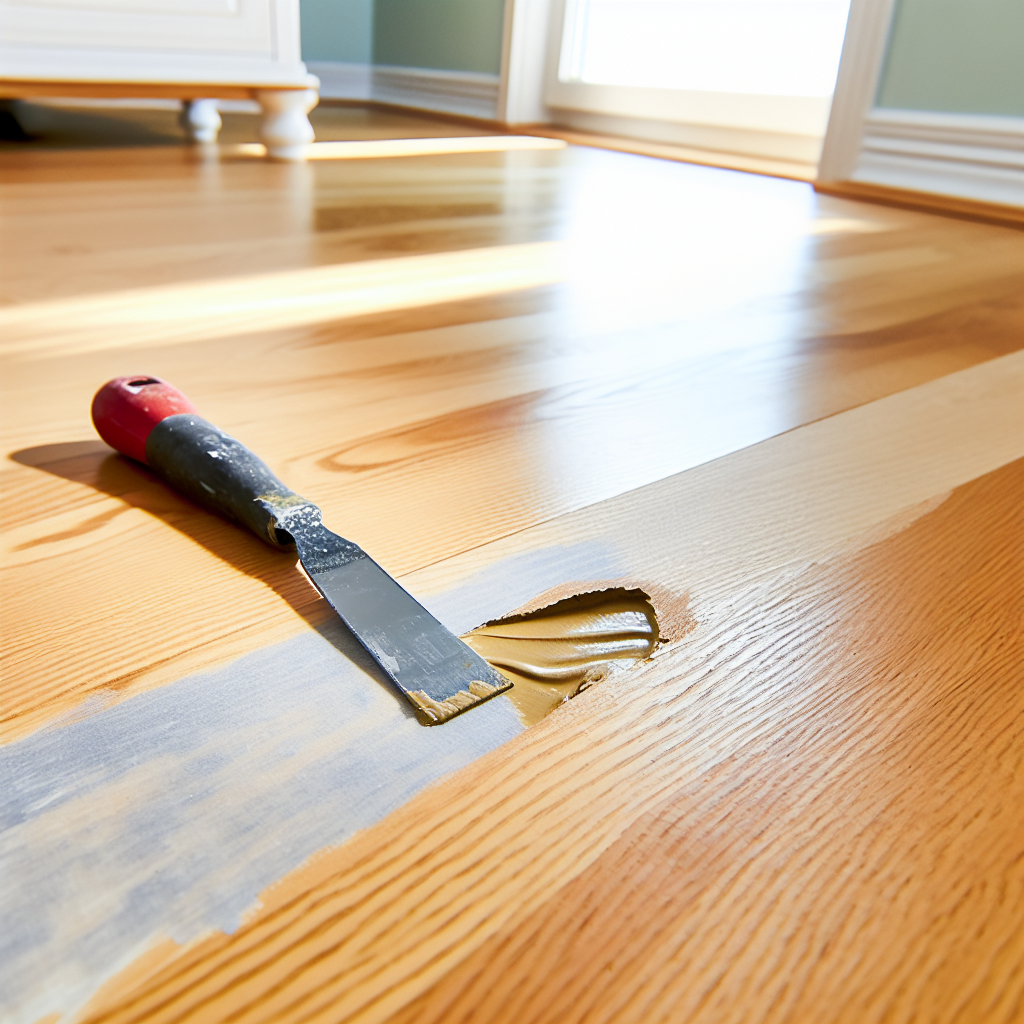
- Apply the Filler: Use a plastic putty knife to press wood filler into the gouge. Work it until the surface is flush with surrounding boards. Less is more — excess filler means more sanding.
- Let It Dry: Most fillers require 20–30 minutes to dry, though humidity matters. If you’re on the Gulf Coast, allow extra time before moving on to the next step.
- Sand the Surface: After it’s dry, gently sand with fine-grit paper so the patch is even. Avoid sanding the finish on nearby planks. Wipe clean with a tack cloth afterward.
- Stain and Seal: If needed, touch up with a matching stain or blending pencil. Apply your choice of polyurethane or finish to seal the repair. Let it dry entirely before walking in the area.
Pro tip from historic Savannah homeowners: For a natural stain hack, test cooled coffee or tea as a light wood tint. It works surprisingly well on honey-toned oak or golden pine — just dab and layer.
When to Call a Professional
Some gouges are best left to the experts. If your damage is widespread, cuts through several planks, or has caused structural issues — especially in high-traffic spots like foyers — call for professional help.
Historic homes in places like Boston or Seattle often feature antique boards like fir or heart pine. These require careful treatment. In these cases, companies like Berlin Flooring in Denver or MasterCare in Chicago offer skilled repairs with custom stain matching and seamless plank replacement.
If you’re planning extended travel, schedule repair work while you’re away. Many digital nomads coordinate sanding or refinishing jobs to happen while they’re abroad — coming home to newly restored floors and no mess.
Preventing Future Floor Gouges
Once you know how to fix gouges in hardwood floors, it’s smart to prevent new ones. Good habits go a long way — and they’re easy to implement.
- Add felt pads under chairs, tables, and couch legs. Check and replace them regularly.
- Use rugs in entryways and busy areas. In Santa Fe, homeowners favor vintage rugs, while Vermont locals use braided wool styles from nearby artisans.
- Keep pets’ nails trimmed, especially if you have active dogs or cats.
- Avoid wearing high heels indoors — especially on older or softer woods like pine.
Draw inspiration from regional traditions. Cape Cod homes often feature woven baskets to collect shoes at the entrance. In the deserts of Arizona, oversized mats trap sand before it scratches delicate finishes.
Craftsmanship Meets Comfort
Each gouge on your hardwood floor may tell a tale, but knowing how to fix gouges in hardwood floors gives you the power to rewrite the story. It’s a renovation skill rooted in care and pride — one that keeps your home beautiful and welcoming through every season of life.
Your floor is more than wood beneath your feet — it’s the foundation of your day-to-day adventures. Whether you’re back from a trip abroad or setting down new roots closer to home, give your floors the love they deserve — and let their natural charm shine on.