Knowing how to fix a peeling bathtub is essential whether you’re restoring a Monterey bungalow or enjoying a weekend rental near Lake George. A bathtub shedding flakes into your hot water disrupts comfort and signals deeper maintenance issues. Peeling can result from age, humidity, poor ventilation, improper refinishing, or harsh cleaners. Fortunately, restoring your tub’s pristine surface is achievable with the right technique—offering the satisfaction of a hike completed or a cozy evening well spent.
Essential Supplies for Fixing a Peeling Bathtub
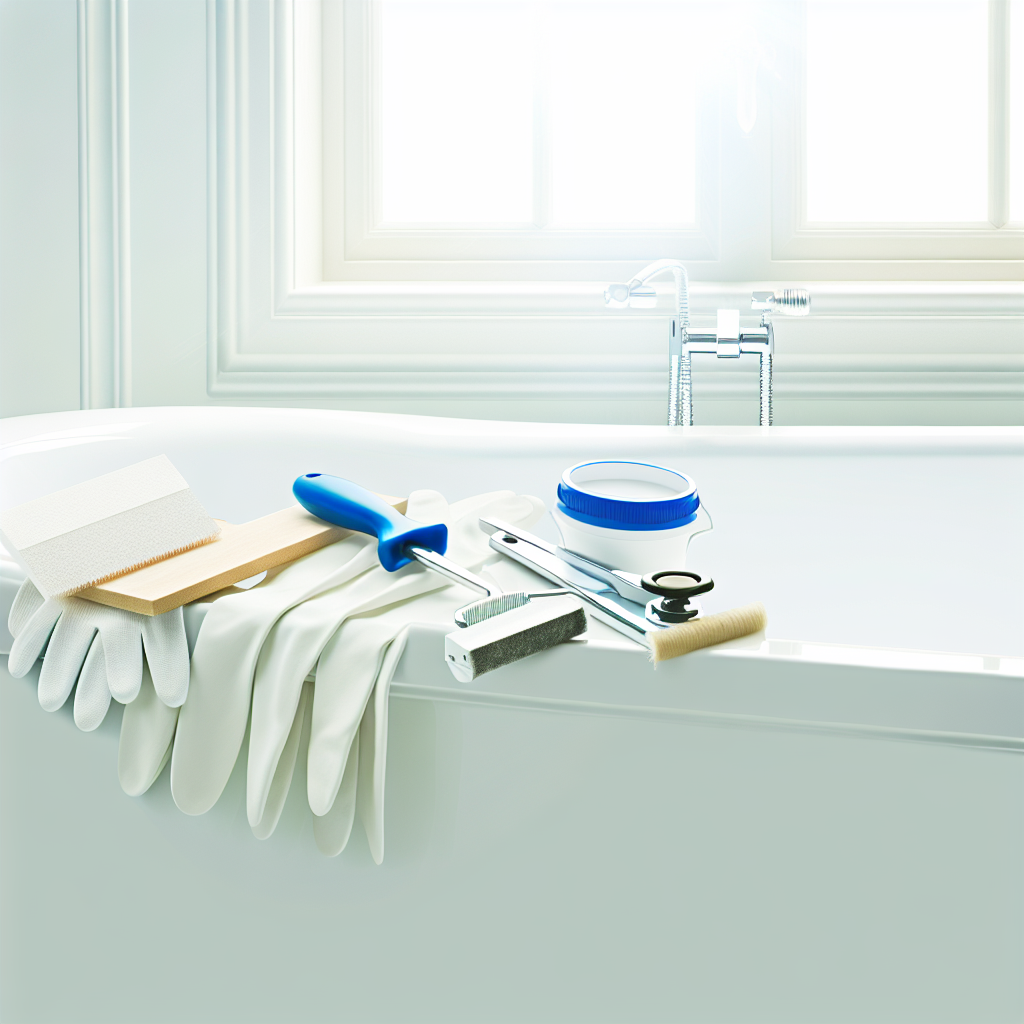
Before diving into how to fix a peeling bathtub, gather all necessary tools. No matter if you’re sprucing up your Brooklyn apartment or traveling through Sedona’s high desert, the basics stay the same:
- Protective gloves and goggles
- Ventilation mask or respirator
- Drop cloths and painter’s tape
- Sandpaper (80- to 400-grit)
- Utility knife or paint scraper
- Tub refinishing kit (epoxy or acrylic-based)
- Caulk and a caulking gun
- Cleaning supplies (dish soap, vinegar, sponge, microfiber cloth)
You can find these items at national chains like Home Depot or local spots like Cole Hardware in San Francisco. Digital nomads and travelers often keep lightweight essentials on hand so even a boutique cabin in Oregon has a spa-worthy bath.
Step-by-Step Instructions: How to Fix a Peeling Bathtub
If DIY projects appeal to you more than guided tours, fixing your bathtub becomes a rewarding process. Like a trail hike, this task requires careful steps and consistent follow-through.
1. Prioritize Safety and Ventilation
Begin by opening windows and using a portable fan. Refinishing fumes can be strong, so airing out the space is crucial. Always wear your respirator and gloves for protection. A comfortable workspace ensures fewer mistakes and a smoother finish.
2. Remove Peeling Paint and Clean Fully
Use a utility knife or scraper to gently remove all flaking areas. Then wash the tub thoroughly with warm water, mild dish soap, and a non-abrasive sponge. For soap scum, white vinegar is effective. This prep ensures the new finish adheres properly.
3. Sand and Smooth All Affected Areas
After the tub dries, sand down the surface. Start with coarse grit (80–150) for rough patches, progressing to 400-grit for a smooth finish. This step creates a clean, even surface for the refinishing materials to bond with. Wipe away the sanding dust using a damp microfiber cloth.
4. Protect Surrounding Surfaces
Apply painter’s tape along any edges where the tub meets tile or flooring. Cover nearby areas with drop cloths to safeguard against drips. This step is especially important if you’re refinishing a rental—damage to other surfaces is costly and easily avoided.
5. Apply the Refinishing Kit Carefully
This is the centerpiece of your how to fix a peeling bathtub mission. Mix the materials according to the kit’s instructions—usually a primer and two-part epoxy or acrylic topcoat. Use a foam brush or roller, applying in thin, even layers. Allow proper drying time (usually 1–2 hours) between coats. Avoid shortcuts here for a long-lasting result.
6. Cure, Re-Caulk, and Reassemble
Let the tub cure completely—most kits recommend 24 to 72 hours before use. Afterward, remove old caulk using a scraper. Clean seam edges with rubbing alcohol, then apply fresh caulk along joints. This seals out moisture and prevents future issues. Clean the refinished area gently before its first use.
Preventing Peeling Tub Surfaces in the Future
Once your bathtub looks brand new, regular upkeep will keep it that way. Use mild, non-abrasive cleaners and avoid harsh chemical products. Weekly cleaning with dish soap or a non-acidic tub cleaner like Rejuvenate is ideal.
Maintain airflow in your bathroom by installing a vent fan or using a dehumidifier in particularly humid regions such as Florida or the Pacific Northwest. Families with kids or pets should keep sharp toys or claws away to preserve the refinished layer for years to come.
When to Call a Professional
If peeling is extensive or involves multiple prior refinishing jobs, hiring a pro is often more efficient. Services like Miracle Method and Perma-Glaze in cities like San Diego, Chicago, or Austin specialize in expert tub resurfacing. They usually include warranties and advanced prep techniques that ensure durability.
In smaller cities like Santa Fe, local companies such as Traditional Bathtub Refinishing are trusted go-tos. If you’re abroad—say in Lisbon or Medellín—search expat forums or Facebook groups for bathtub “re-glazing” providers. Rental hosts often share vetted service providers for hassle-free solutions.
Cost and Time Estimates for DIY Tub Repair
Learning how to fix a peeling bathtub is highly cost-effective. A quality DIY refinishing kit, such as Rust-Oleum Tub & Tile or Ekopel 2K, typically costs $30–$70. Add about $20 for prep tools and $30 more if you need a caulk gun or scraper.
In terms of timing, you’ll need:
- 2–3 hours for prep and paint removal
- 1–2 hours for applying the refinishing coat(s)
- 24–72 hours for full curing before use
If you’re also vacationing—maybe enjoying Napa’s vineyards or visiting Cheyenne Mountain Zoo—schedule the steps over a weekend. Many people plan around trips so curing happens while the bathroom isn’t needed.
Restore Comfort—Wherever You Call Home
Whether you’re upgrading a Rockport beach house or returning from a trek through Vermont’s Green Mountains, knowing how to fix a peeling bathtub gives you control over your comfort. Your tub becomes more than a place to rinse off—it’s part of your sanctuary.
Think of all the stops that led you here: cabins with clawfoot charm, hostels with limited amenities, hotels with quirky plumbing. Now, you’ve added tub refinishing to your traveler’s toolkit—a skill that brings both luxury and functionality wherever your journey takes you.